Friday, October 18, 2024
Home Blog Page 13

China’s Terraced Fields: An Ancient Agricultural Legacy

0

Introduction: Nestled in the heart of Asia, China boasts a rich history of agricultural ingenuity. Among its many remarkable agricultural practices, China’s terrace farming system stands out as an enduring legacy of sustainable land management. This article delves into the fascinating world of China’s terrace farming, exploring its historical origins, engineering brilliance, and its continued relevance in modern times.

Historical Roots of China’s Terrace Farming

1 Centuries of Cultivation: China’s terrace farming dates back over 2,000 years, with the earliest terraced fields found in regions like Yunnan and Guangxi. The ancient Chinese civilizations, recognizing the potential of transforming hilly terrains into arable land, developed terrace farming to overcome geographical challenges.

 2 Rice Terraces: Among the most famous examples of China’s terrace farming are the breathtaking rice terraces found in places like Longji and Yuanyang. These impressive terraced landscapes reflect the Chinese people’s deep understanding of their environment and the importance of sustainable land use.

Ingenious Engineering

1 Terraced Design: China’s terrace farming involves the creation of stepped platforms along the contours of hills and mountains. Stone retaining walls are meticulously constructed to support each level, preventing soil erosion and retaining water for irrigation.

2 Water Management: A hallmark of China’s terrace farming lies in its intricate water management systems. Gravity-fed irrigation channels, known as “jing,” efficiently distribute water from higher to lower terraces, ensuring that each level receives adequate water supply for optimal crop growth.

Sustainable Land Management:

1 Soil Conservation: China’s terrace farming exemplifies a profound understanding of soil conservation. By slowing down water runoff and minimizing soil erosion, the terraces preserve fertile topsoil, vital for sustaining high agricultural productivity.

2 Biodiversity: Terrace farming in China promotes the cultivation of a diverse range of crops, such as rice, wheat, tea, and medicinal herbs. The varying microclimates created by different terrace levels support the growth of various crops, enhancing food security and preserving biodiversity.


Cultural and Social Significance

1 Cultural Heritage: China’s terrace farming landscapes are not just agricultural marvels; they also hold immense cultural value. These terraced fields have become symbols of traditional farming wisdom, reflecting the symbiotic relationship between humans and nature.

2 Community Cohesion: Terrace farming in China often involves collective efforts, with entire communities participating in the construction and maintenance of the terraces. This communal approach fosters a strong sense of unity and cooperation among farmers.

Modern Relevance

Sustainable Practices: As the world faces environmental challenges, China’s terrace farming remains a beacon of sustainable land management. Its methods of soil conservation, water management, and crop diversity inspire modern agricultural practices focused on sustainability.

5.2 Tourism and Preservation: Many of China’s terrace farming regions have become popular tourist destinations, attracting visitors with their scenic beauty and cultural significance. This growing interest in preserving these landscapes has spurred conservation efforts to protect and sustain traditional farming practices.

Conclusion

China’s terrace farming is an exceptional testament to the harmonious relationship between humans and nature. With its ingenious engineering, sustainable land management, and cultural significance, this ancient agricultural legacy continues to inspire admiration and respect. As we celebrate China’s terrace farming, it becomes essential to preserve and learn from its sustainable practices, cultivating a deeper understanding of the profound connection between agriculture and the environment.

 

The Significance of Terrace Farming: Preserving Land, Nourishing Communities

0

Introduction: Terrace farming has emerged as a pivotal agricultural technique over millennia, transforming rugged landscapes into productive oases. This article delves into the paramount importance of terrace farming, exploring its role in promoting sustainable agriculture, conserving natural resources, enhancing food security, and preserving cultural heritage.

 Preserving Fragile Landscapes

Mitigating Soil Erosion: Terrace farming effectively combats soil erosion by slowing down water flow and reducing the risk of valuable topsoil washing away during heavy rains. The stepped platforms, fortified with retaining walls, ensure the preservation of fertile soil for continued crop cultivation.

Preventing Land Degradation: In hilly and mountainous regions, terrace farming prevents land degradation, which can lead to desertification and the loss of arable land. By transforming steep slopes into flat or gently sloping fields, terrace farming minimizes the negative impact of human activity on the environment.

Embracing Sustainable Agriculture

Water Conservation: Terrace farming fosters efficient water management. The flat platforms capture and retain rainwater, promoting groundwater recharge and ensuring a consistent water supply for crops. This sustainable irrigation system minimizes water wastage, conserving a precious resource.

Crop Diversity: Terrace farming encourages the cultivation of diverse crops on different terraced levels. The varying microclimates support the growth of various plants, enhancing food security and resilience against climate fluctuations and pests.

Enhancing Food Security

Maximizing Arable Land: In regions with limited flat land for cultivation, terrace farming expands the available agricultural space. This increased arable land allows communities to grow more food, reducing their dependency on external food sources.

Steady Crop Production: Terrace farming’s water management practices ensure a consistent water supply to crops, reducing the risk of crop failure during droughts or heavy rains. The steady production of crops contributes to stable food supplies and improved livelihoods.

Preserving Cultural Heritage

Ancient Wisdom Passed Down: Terrace farming is often deeply rooted in the traditions and cultures of communities that have practiced it for generations. The knowledge of constructing and maintaining terraces is passed down through oral histories, preserving the unique identity and heritage of these communities.

Connection with Nature: Terrace farming fosters a profound connection between farmers and their land. The careful observation of natural elements, such as water flow and soil quality, reinforces an intimate understanding of the ecosystem, nurturing a harmonious relationship with nature.

Conclusion

Terrace farming stands as a vital agricultural practice with multifaceted significance. Its ability to preserve fragile landscapes, promote sustainable agriculture, enhance food security, and preserve cultural heritage makes it an invaluable technique in a world grappling with environmental challenges and food insecurity. As we recognize the importance of terrace farming, it becomes paramount to integrate its sustainable principles into modern agricultural practices, fostering a harmonious coexistence between humanity and the planet.

Maya Terrace Farming: Unraveling the Agricultural Wisdom of an Ancient Civilization

0

Introduction: The Maya civilization, renowned for its sophisticated culture and remarkable achievements, left an indelible mark on history. Among their many accomplishments, Maya terrace farming stands out as an innovative agricultural practice that allowed them to thrive in the challenging landscapes of Mesoamerica. This article delves into the fascinating world of Maya terrace farming, exploring its historical significance, agricultural techniques, and its enduring legacy on modern agricultural practices.

  1. The Historical Roots of Maya Terrace Farming: Dating back to the pre-classic period, the Maya people settled in the dense rainforests and hilly terrains of present-day Mexico, Guatemala, Belize, and Honduras. To overcome the constraints of uneven terrain and promote sustainable agriculture, they ingeniously crafted terrace farming systems.
  2. The Art of Maya Terrace Farming: 2.1 Terrace Design and Engineering: The Maya constructed terraces by carving flat platforms into the hillsides. These stepped structures were supported by stone walls, carefully aligned to prevent soil erosion and withstand heavy rainfall. Their meticulous engineering ensured efficient water drainage and preservation of fertile topsoil.

 Water Management

The Maya terrace farming systems incorporated an advanced irrigation network. Canals, reservoirs, and aqueducts were engineered to distribute water from nearby rivers and collect rainwater, providing a consistent water supply to nourish their crops.

Agricultural Advantages

Soil Conservation: Maya terrace farming demonstrated a profound understanding of soil conservation. The terraces effectively prevented soil erosion during heavy rains, safeguarding the nutrient-rich topsoil and maintaining its fertility for continuous crop cultivation.

 Crop Diversity: The terraced fields offered varying microclimates, allowing the Maya to cultivate a diverse range of crops, including maize, beans, squash, cacao, and various fruits. This agricultural diversity enhanced food security and supported their flourishing civilization.

The Cultural Significance

Maya terrace farming was interwoven with their cultural and spiritual beliefs. The agricultural practices were intricately linked to their religious ceremonies and calendar systems. Terraces were often considered sacred spaces, reflecting their deep reverence for nature and the land

Legacy and Modern Applications

 Enduring Impact: While the classic Maya civilization eventually declined, the legacy of their terrace farming endures. Many of these ancient terraces can still be found in the region, serving as a testament to the resilience and sustainability of this agricultural system.

 Inspiration for Modern Agriculture: The Maya terrace farming techniques continue to inspire modern agricultural practices. Lessons from their water management systems, crop diversity, and soil conservation are increasingly integrated into sustainable farming practices worldwide.

Conclusion

Maya terrace farming exemplifies the remarkable ingenuity of an ancient civilization that harmoniously coexisted with its environment. Their mastery of agricultural engineering, water management, and crop diversity enabled them to flourish amidst the challenges of Mesoamerican landscapes. As we look back on the agricultural wisdom of the Maya, we gain valuable insights into how sustainable practices can shape the future of modern agriculture. By drawing from the legacy of Maya terrace farming, we can cultivate a deeper understanding of our relationship with the land and strive for a more ecologically conscious and prosperous world.


Terrace Farming vs. Slash-and-Burn Agriculture: A Comparative Analysis

0

Introduction: Throughout history, various agricultural practices have been developed to suit different landscapes and meet the needs of communities. Terrace farming and slash-and-burn agriculture are two distinct approaches that have been employed by different cultures. In this article, we will explore the key differences between these agricultural techniques, shedding light on how terrace farming and slash-and-burn agriculture greatly diverged in their methods and ecological impact.

Understanding Terrace Farming: Terrace farming involves creating stepped platforms on sloped terrains to cultivate crops. Retaining walls are built to support each level, effectively preventing soil erosion and conserving water. Terrace farming is prevalent in mountainous regions and areas with limited flat land for agriculture.

Grasping Slash-and-Burn Agriculture: Slash-and-burn agriculture, also known as shifting cultivation, is a traditional method where farmers clear a patch of land by cutting down and burning vegetation. The ashes from the burned plants enrich the soil temporarily, allowing for a short period of cultivation. After several years, the land loses fertility, and farmers move on to a new area, leaving the old plot to regenerate naturally.

Impact on the Environment:  Terrace Farming: Unlike slash-and-burn agriculture, terrace farming is a sustainable practice that focuses on soil conservation. The construction of terraces prevents soil erosion and maintains soil fertility over the long term, promoting environmental stability and minimizing negative impacts on nearby ecosystems.

Slash-and-Burn Agriculture: This form of agriculture has a more significant ecological impact. The clearing and burning of large areas of land lead to deforestation and habitat destruction. Although it can be sustainable when practiced on a small scale, modern intensification of slash-and-burn practices can lead to soil degradation, loss of biodiversity, and greenhouse gas emissions.

Crop Diversity and Long-Term Yield

Terrace Farming: The stepped terraces of terrace farming allow for the cultivation of diverse crops at different elevations, promoting crop diversity. The sustainable practices ensure long-term yield and provide farmers with a variety of food sources and economic opportunities.

Slash-and-Burn Agriculture: Due to its short-term nature and reliance on natural regeneration, slash-and-burn agriculture often leads to limited crop diversity and lower long-term yields. As fertility declines, farmers are forced to move to new areas, causing a cycle of land degradation and limited agricultural productivity.

Cultural and Social Aspects: Terrace farming often requires extensive communal efforts in construction and maintenance, fostering a sense of community and cooperation among farmers. In contrast, slash-and-burn agriculture is more individualistic, as families or small groups move from one plot to another, relying on the land’s natural recovery.

Conclusion

In summary, terrace farming and slash-and-burn agriculture represent two distinct agricultural practices that greatly differed in their methods and environmental impact. Terrace farming showcased sustainable and innovative engineering techniques, emphasizing soil conservation and long-term crop diversity. On the other hand, slash-and-burn agriculture, while historically viable on a smaller scale, is associated with deforestation and land degradation. Understanding the differences between these practices is essential for shaping modern agricultural approaches that prioritize environmental sustainability and the well-being of communities around the world.

Incan Terrace Farming: The Ingenious Agricultural Marvel of the Andes

0

Introduction: In the lofty Andean mountains of South America, the ancient Inca civilization flourished, leaving behind an enduring legacy of impressive architecture, engineering, and agriculture. Among their remarkable achievements, Incan terrace farming stands out as a testament to their innovative agricultural practices. This article delves into the fascinating world of Incan terrace farming, exploring its historical significance, engineering brilliance, and enduring impact on modern agriculture.

The Historical Roots of Incan Terrace Farming: Centuries ago, the Inca people cultivated vast expanses of land in the Andes, which presented numerous geographical challenges. In response, they ingeniously transformed steep slopes into terraced agricultural fields. These terraces, known as “andenes,” were designed to harness the natural water flow and sunlight while preventing soil erosion.

The Art of Engineering Marvels: Terrace Construction: Incan terrace farming involved meticulous engineering, with each terrace skillfully carved into the mountain slopes. These stepped platforms were supported by stone walls known as “pirka,” carefully constructed to prevent soil from washing away during heavy rains.

Water Management: An intricate system of irrigation channels, known as “amunas,” channeled water from higher altitudes to lower terraces. This ingenious design ensured each level received the necessary water for crop cultivation, promoting the growth of diverse crops at varying altitudes.

Agricultural Advantages

Soil Conservation:   The terraces effectively curtailed soil erosion, preserving fertile topsoil and preventing nutrient loss. This sustainable land management technique contributed to long-term soil fertility, vital for sustaining the population’s agricultural needs.

Crop Diversity: Incan terrace farming facilitated the cultivation of a wide variety of crops, ranging from potatoes and maize to quinoa and medicinal plants. By capitalizing on microclimates created by the terraces, the Incas optimized crop yields and ensured food security.

Cultural and Social Significance

Incan terrace farming was not merely a practical agricultural method; it held immense cultural and social value. These agricultural landscapes were considered sacred and often associated with religious ceremonies and offerings to the gods, reinforcing the deep connection between the Inca people and their land.

Legacy and Modern Applications

Enduring Impact: Despite the decline of the Incan civilization, the legacy of their terrace farming continues to endure. Many of the ancient terraces are still in use today, serving as a living testament to the sustainability and resilience of this agricultural practice.

Inspiration for Modern Agriculture: Incan terrace farming continues to inspire contemporary agricultural practices, particularly in regions with challenging terrain. Lessons from the past, such as water management techniques and crop diversity, are increasingly incorporated into modern sustainable farming methods.

Conclusion

The Incan terrace farming system remains an extraordinary example of how ancient civilizations skillfully adapted to their environment to ensure agricultural success. Through ingenious engineering, they transformed seemingly inhospitable landscapes into bountiful oases, sustaining their civilization for generations. The legacy of Incan terrace farming endures, inspiring modern agriculture to embrace sustainable practices and cultivate a deeper connection with the land. As we reflect on this remarkable chapter of history, we gain valuable insights into the harmonious relationship between human ingenuity and nature’s bounty.

Terrace Farming: A Sustainable Agricultural Marvel

0

Introduction: Terrace farming, a remarkable agricultural practice, has been harnessed by communities worldwide to cultivate crops on challenging hilly terrains. This method involves constructing stepped platforms on slopes, forming a series of levels resembling natural steps. These terraces serve as efficient solutions to combat erosion, conserve water, and maximize arable land while promoting sustainable agriculture. In this article, we delve into the concept of terrace farming, its benefits, and how it has become an integral part of various cultures across the globe.

Understanding Terrace Farming

Terrace farming is characterized by the creation of leveled fields supported by retaining walls on sloped landscapes. Each terrace helps to retain soil and water, making it suitable for cultivating crops that would otherwise struggle to grow on steep hillsides. This method dates back centuries and continues to thrive as a testament to human adaptability and resourcefulness.

Advantages of Terrace Farming

        1. Soil Conservation: One of the primary benefits of terrace farming is its ability to prevent soil erosion. The terraces slow down the flow of rainwater, reducing the risk of valuable topsoil being washed away, which preserves its nutrient-rich composition and enhances crop productivity.

        2. Water Management: Terrace farming acts as a natural water management system. The terraces capture rainwater, allowing it to infiltrate the soil and recharge groundwater sources. This strategic water distribution ensures consistent irrigation for crops while minimizing water wastage.

        3.Increased Arable Land: By converting steep slopes into usable terraced fields, this technique effectively expands the available arable land. Farmers can diversify their crops based on microclimates, fostering agricultural productivity and resilience.

Terrace Farming’s Environmental Impact

Terrace farming promotes sustainable agriculture by minimizing the need for chemical inputs like fertilizers and pesticides. The terraces help retain nutrients, reducing the risk of runoff that could pollute nearby water bodies and harm ecosystems. This environmentally-friendly approach encourages biodiversity and preserves the natural balance of the surrounding environment.

The Art and Science of Terrace Farming

Terrace farming requires a combination of traditional knowledge and modern engineering. The construction of sturdy retaining walls and terraces demands skillful craftsmanship, while considering factors like slope gradient and soil composition ensures optimal crop growth. Over generations, communities have honed this art to suit their specific geographical and climatic conditions.

Cultural Significance of Terrace Farming

Beyond its agricultural significance, terrace farming holds cultural value in many regions. It often reflects the intimate connection between communities and their land, as generations have contributed to the construction and preservation of these agricultural landscapes. The practice embodies a profound respect for nature and its ability to sustain livelihoods.

Conclusion

Terrace farming exemplifies the ingenuity of humankind in adapting to challenging terrains while nurturing the environment. By carefully harnessing nature’s steps, this method has proven to be a sustainable agricultural marvel. As we embrace the principles of terrace farming, we not only ensure food security but also preserve the delicate balance between humanity and the Earth, paving the way for a greener and more resilient future.

Terrace Farming: Harnessing Nature’s Steps for Sustainable Agriculture

0

Introduction: Terrace farming, a time-honored agricultural technique, has been shaping the landscape of hilly regions for centuries. By transforming steep slopes into productive farmland, this method offers numerous benefits, including soil conservation, water management, and increased crop diversity. In this article, we will explore the principles and advantages of terrace farming, shedding light on how it has enabled communities to cultivate crops in challenging terrains while promoting environmental sustainability.

  1. The Concept of Terrace Farming

    Terrace farming revolves around the creation of stepped platforms on hillsides, forming a series of levels that mimic the natural contours of the land. Each terrace, supported by retaining walls, retains soil and water, allowing for the cultivation of crops on what was once considered inhospitable terrain. This ancient practice requires expertise in engineering and an understanding of the local ecosystem to ensure its success.

  2. Mitigating Soil Erosion

    One of the primary advantages of terrace farming is its ability to combat soil erosion effectively. By slowing down the flow of rainwater, terraces prevent topsoil from being washed away, preserving its fertility. The reduced erosion not only enhances crop productivity but also prevents sedimentation in nearby water bodies, promoting cleaner water resources.

  3. Water Management and Conservation

    Terraces act as natural water management systems, effectively trapping rainwater and promoting its infiltration into the soil. This process helps replenish groundwater sources, reducing the impact of droughts and contributing to the sustainability of the local water supply. Additionally, the controlled release of water from terrace to terrace minimizes water wastage, making it an eco-friendly irrigation method.

  4. Expanding Arable Land

    In regions with limited flat land for cultivation, terrace farming offers a solution by converting steep slopes into multiple usable levels. By creating more arable land, this method maximizes agricultural productivity and provides farmers with greater opportunities for crop diversification. The varying microclimates on different terraces also encourage the growth of a wide range of crops suited to each specific environment.

  5. Fostering Sustainable Agriculture

    Terrace farming aligns with the principles of sustainable agriculture by promoting resource conservation and reducing environmental impact. The practice reduces the need for chemical inputs, as the terraces help retain nutrients in the soil and minimize runoff of fertilizers and pesticides. This, in turn, supports biodiversity and enhances the overall health of the ecosystem.

  6. Modern Adaptations and Challenges

    While terrace farming remains an integral part of traditional agriculture in many regions, modern technology has brought about advancements in terrace construction and maintenance. Today, engineering techniques, such as reinforced concrete retaining walls, offer greater stability and longevity to terraced landscapes. However, despite these innovations, challenges remain, including the labor-intensive nature of terrace construction and the potential for degradation if not properly maintained.

Conclusion

Terrace farming stands as a testament to human ingenuity and adaptation to challenging landscapes. By harnessing the natural steps of the terrain, this ancient agricultural technique has enabled communities to thrive and cultivate crops sustainably in mountainous regions. As the world faces increasing environmental pressures, terrace farming exemplifies the importance of integrating traditional wisdom with modern knowledge to create a more resilient and ecologically conscious future for agriculture.

Does Improved Kienyeji Chicken Brood? Surprising Facts!

0

Introduction: Improved kienyeji chickens have become a popular choice among farmers in Kenya due to their profitability and productivity. These birds are known for their excellent meat and egg production, fast growth, and ease of rearing. In this comprehensive guide, we will explore how to start rearing improved kienyeji chickens, covering key aspects such as housing, health, market, business planning, capital, land, breed selection

I. Building a Suitable Chicken House A well-constructed chicken house is essential for protecting and promoting the well-being of improved kienyeji chickens. Adequate lighting, warmth, space, and cleanliness should be ensured to boost productivity and prevent diseases.

II. Prioritizing Chicken Health Maintaining the health of the birds is crucial for higher profits and productivity. Employing a veterinary doctor to administer proper medications and regular health checks is recommended.

III. Identifying the Right Market To maximize profits, it’s crucial to secure a stable market for your improved kienyeji chicken products. Establish connections with hotels, butcheries, meat processing industries, and egg processing industries to sell your products at desirable prices.

IV. Creating a Business Plan Organize your chicken farm effectively by developing a business plan. A well-structured plan allows for smooth operations and enables you to project approximate profits over time.

V. Securing Adequate Capital Sourcing enough capital is essential for the successful management of your kienyeji chicken farm. Consider seeking financial support from friends, relatives, or loans to ensure smooth operations and expansion.

VI. Acquiring Sufficient Land The size of your land significantly impacts productivity. A larger land area allows for expansion and higher production rates, while a smaller plot can be utilized effectively with proper planning.

VII. Strategic Farm Location Choosing a farm location near the market reduces transportation costs and enables faster product delivery, contributing to better profits. Conversely, remote locations may lead to increased costs and time wastage.

VIII. Selecting the Best Breed Choosing the right breed is crucial for successful kienyeji chicken farming. Consider breeds that excel in egg production, meat production, or both, to optimize your farming venture.

Commonly Asked Questions:

  1. Best Improved Kienyeji Breed Kari improved chicken and kuroiler are among the best improved kienyeji chicken breeds.
  2. Where to Buy Kari Improved Kienyeji Chicken in Nairobi Look for trusted sellers like “Kienyeji Chicken” and “Kari Improved Kienyeji Chicken” to purchase these birds at affordable prices in Nairobi.
  3. Improved Kienyeji Egg Laying Improved kienyeji chickens can lay between 220 to 280 eggs per year.
  4. Where to Buy Kari Improved Kienyeji Chicken in Meru Find reputable sellers like “Alphachic Poultry,” “Kwetu Poultry Farm,” and “Merulands Poultry Centre” in Meru.

Improved Kienyeji Chicken Prices: Prices may vary based on size and location, but fully grown improved kienyeji chickens can cost between Ksh. 500 and Ksh. 2000 on average.

Conclusion

Raising improved kienyeji chickens in Kenya offers a profitable and productive venture for farmers. By following the guidelines on housing, health, market, business planning, capital, land, and breed selection, you can ensure success in your chicken farming journey

Sheep Farming in Telangana: A Comprehensive Guide for Beginners

0

Introduction: Sheep farming in Telangana, India, is a popular and lucrative business that contributes significantly to the national economy. This comprehensive guide will explore the scope, importance, advantages, breeds, feed management, housing, breeding, diseases, and vaccination practices in sheep farming.

I. Scope and Importance of Sheep Farming in Telangana Sheep farming plays a vital role in the national economy, with sheep meat exports contributing 8% to the total export value of agricultural and processed food products. India’s sheep population is estimated at 71.6 million, making it a substantial industry for employment and livelihoods, particularly in Telangana.

II. Advantages of Sheep Farming Business in Telangana Sheep farming offers numerous advantages, including low-cost facilities, rapid multiplication of flocks, efficient conversion of grass into various products (milk, meat, and wool), and weed control capabilities. Moreover, sheep are gentle grazers that pose minimal damage to crops or trees, making them compatible with agricultural activities.

III. Sheep Breeds of Telangana Telangana is home to several native sheep breeds, including:

  1. Deccani Sheep Breed
  2. Nellore Sheep Breed
  3. Bellary Sheep Breed 

IV. Feed Management for Healthy Sheep Balancing the sheep’s diet with essential nutrients such as protein, TDN (Total Digestible Nutrients), phosphorus, and calcium is crucial for their health, growth, and reproduction. Providing pasture and well-cured hay year-round, with added supplements in winter, helps maintain a healthy flock.

V. Sheep Housing Management Efficient sheep housing involves providing shelter from harsh climates and predators, along with proper ventilation, drainage, and fencing. The sheep house should be dry, hygienic, and located at a higher elevation to prevent flood damage.

VI. Sheep Breeding Management in Telangana Effective sheep breeding practices involve selecting healthy, well-weighted females with good growth rates and early puberty. Sheep can be used for breeding purposes for 7-8 years, and artificial insemination is commonly preferred for commercial rearing.

VII. Sheep Diseases and Vaccination Management Regular health checks and timely treatment are essential to maintain a healthy flock. Vaccination is a crucial aspect of disease prevention, and farmers must be vigilant in observing any changes in the sheep’s behavior or physical activities.

VIII. Sheep Farming Tips for Beginners For successful sheep farming, beginners should prioritize the health and well-being of the sheep, have a basic understanding of sheep breeds and farming practices, and ensure strong and weather-resistant housing. The choice of market and demand for specific sheep breeds is essential for maximizing profits.

Conclusion

Sheep farming in Telangana offers a promising venture for aspiring farmers, providing economic stability and contributing to the national agricultural sector. By understanding the advantages, breeds, feed management, housing, breeding, and health practices, farmers can ensure the success of their sheep farming endeavors

Does Improved Kienyeji Chicken Brood? Surprising Facts!

0

Introduction: Discover the lucrative world of improved kienyeji chicken farming! This article outlines the key factors and steps to start raising these profitable and productive birds. From creating the right housing to finding the right market, we’ll guide you through the process of rearing improved kienyeji chickens in Kenya.

  1. Build a Suitable Chicken House Constructing a proper chicken house is essential for the well-being of your improved kienyeji chickens. Ensure the coop is warm, spacious, and clean at all times. Adequate lighting is crucial for their productivity and comfort. A well-designed chicken house will protect them from harsh weather and predators.
  2. Ensure Regular Veterinary Check-ups Maintaining the health of your birds is crucial for higher profits. Regular veterinary check-ups and proper medication administration will promote their growth and productivity. Healthy birds reach market weight faster, leading to increased profitability.
  3. Identify and Secure the Right Market To maximize profits, identify potential buyers before you start rearing improved kienyeji chickens. Seek partnerships with hotels, butcheries, meat processing industries, and egg processing companies. Establishing a reliable market will ensure a smooth sales process and better returns.
  4. Create a Business Plan A well-structured business plan will help you organize your farming activities and forecast potential profits. Carefully plan the logistics, costs, and projected income to ensure smooth operations and success in your improved kienyeji chicken venture.
  5. Secure Adequate Capital Sourcing sufficient capital is vital for the proper management of your chicken farm. Whether from friends, relatives, or loans, having enough funds will enable you to invest in the necessary infrastructure and resources for a successful operation.
  6. Choose the Right Location and Land Size Selecting the right location for your farm plays a significant role in cost-saving and efficiency. A farm close to the market will reduce transportation expenses and time. Additionally, ensure you have enough land to support future expansion and increased productivity.
  7. Select the Best Breed Choosing the right breed is crucial for a successful improved kienyeji chicken farm. Opt for breeds that excel in egg or meat production or both, depending on your market demands. Some popular options include Kari improved chickens and kuroilers.

Commonly Asked Questions:

  1. What is the Best Improved Kienyeji Breed? Kari improved chickens and kuroilers are considered among the best breeds for improved kienyeji chicken farming.
  2. Where Can I Buy Kari Improved Kienyeji Chicken in Nairobi? You can purchase Kari improved kienyeji chicken from reliable sources like kienyeji chicken and Kari improved kienyeji chicken farms.
  3. How Many Eggs Does an Improved Kienyeji Chicken Lay? On average, an improved kienyeji chicken can lay between 220 to 280 eggs per year.
  4. Where Can I Buy Kari Improved Kienyeji Chicken in Meru? Some reputable places to purchase Kari improved kienyeji chicken in Meru include Alphachic Poultry, Kwetu Poultry Farm, and Merulands Poultry Centre.

Improved Kienyeji Chicken Prices: The prices of Kari improved kienyeji chicken vary depending on size and the supplier. Generally, you can find them for as low as Ksh.100 onwards. Fully grown improved kienyeji chicken prices range between Ksh.500 to Ksh.2000, based on their size.

Conclusion

Starting a successful improved kienyeji chicken farm requires proper planning, attention to health, and securing a reliable market. By following these eight essential steps, you can embark on a profitable and rewarding farming journey with improved kienyeji chickens in Kenya. Happy farming!


How Do You Rear Improve Kienyeji? 10 Amazing Ways to Look at!

0

Introduction: Improved kienyeji chickens have become a favored choice among farmers in Kenya due to their dual productivity in meat and egg production. To ensure their health and productivity, proper care and adherence to essential procedures are crucial. In this comprehensive guide, we will explore ten amazing ways to successfully rear improved kienyeji chickens, resulting in increased profitability and success in your poultry venture.

Section 1: Preparing for Rearing Improved Kienyeji

  1. Secure Sufficient Capital: Before starting, ensure you have enough capital to run the project smoothly. Capital is needed for purchasing equipment and initial investments. Consider sources such as friends, family, loans, or grants.
  2. Acquire Adequate Land: Ensure you have enough land to set up your farm. Ample space allows for expansion and increased production. A larger portion is recommended for future scalability.
  3. Develop a Comprehensive Business Plan: Draft a well-structured business plan that outlines your objectives, strategies, and financial projections. A solid plan will guide the smooth operation of your poultry venture.

Section 2: Best Practices for Improved Kienyeji Rearing

  1. Choose the Right Breed: Select the most productive breed for better results. Thorough research and consultation with experts will help you choose the best breed that aligns with your goals.
  2. Provide Proper Feeding: Use a kienyeji chicken feeding program to plan your birds’ diet at different stages. Invest in quality feeds such as Fugo layer meal, growers mash, kienyeji mash, and chick mash to maximize productivity.
  3. Construct Suitable Housing: Build well-lit, spacious, and well-ventilated chicken houses with appropriate temperature levels. Maintaining a clean and comfortable environment enhances production.

Section 3: Management Strategies for Improved Kienyeji

  1. Implement Vaccination Procedures: Follow the improved kienyeji chicken vaccination schedule to ensure the birds’ health. Regular vaccination and deworming are essential for optimal productivity.
  2. Locate an Ideal Farm Location: Choose a farm location close to the market to save on transportation costs and time. Access to a suitable market is crucial for selling your end products at profitable prices.
  3. Find Reliable Markets: Before starting the project, secure a stable market to sell your products. Having a ready market ensures profitability and a steady income.
  4. Invest in Feeder Equipment: Purchase feeders to minimize food wastage and maximize feed utilization. Proper feeding results in faster growth rates, leading to increased market readiness.

Advantages and Disadvantages of Improved Kienyeji

Improved kienyeji chickens offer several advantages, such as:

  • High productivity in both meat and egg production.
  • Resilience and adaptability to various conditions. However, they have some drawbacks, including:
  • Inability to brood.
  • Higher cost of rearing compared to other chicken breeds.

Conclusion

Successfully rearing improved kienyeji chickens requires careful planning, proper feeding, and effective management. By following the ten amazing ways outlined in this guide, farmers can achieve higher productivity, profitability, and overall success in their improved kienyeji chicken farming ventures.


How Long Does It Take for Kenbro Chicken to Mature? (Solved!)

0

Introduction: Kenbro chicken has become a popular choice for farmers due to its versatility in both meat and egg production, disease resistance, and suitability for free-range feeding. In this comprehensive guide, we will explore how long it takes for Kenbro chickens to mature, their remarkable advantages, and essential management tips for successful farming.

Section 1: Maturation of Kenbro Chicken

  1. Productive at 25 Weeks: Kenbro chickens start their productive phase at 25 weeks, which translates to six months of age. At this point, they begin laying eggs, known for their medium-brown hue. Kenbro chickens are notably renowned for their higher egg production rates compared to other breeds, making them a favorable choice for egg-focused farmers.

Section 2: 6 Advantages of Kenbro Chicken Breed

  1. Cost-Effective Feeding: Kenbro chickens are advantageous because they consume less feed than commercial layers and broilers. This efficient feed conversion allows farmers to save on feeding costs, reinvesting the funds for expansion and higher profits.
  2. Faster Maturity: With a quick maturity rate, Kenbro chickens become market-ready in a shorter timeframe. This accelerated growth benefits farmers as they can achieve better profits in a shorter duration.
  3. High Egg Production: Kenbro chickens boast higher egg production rates compared to indigenous breeds. With an impressive yield of 20 to 25 eggs per month and approximately 280 eggs per year, they offer farmers profitable egg-laying potential.
  4. Versatile Diet: Kenbro chickens can feed on various types of meals, including kitchen waste and table scraps. Their ability to thrive on diverse feeds provides flexibility and cost-saving benefits for farmers.
  5. Adaptability to Free-Range Feeding: In addition to purchased feeds, Kenbro chickens excel as scavengers during free-range feeding. Foraging on natural nutrients enhances their health, resulting in increased market demand.
  6. Strong Disease Resistance: Kenbro chickens demonstrate moderate resistance to diseases, making them suitable for various environments. Reduced susceptibility to illnesses ensures better productivity and cost savings on treatment.

Section 3: 4 Ways to Manage Kenbro Chicken

  1. Provide Adequate Housing: Creating a suitable housing system is critical for managing Kenbro chickens. Ensure well-lit, spacious, and well-ventilated houses with appropriate temperatures. A clean environment promotes better health and production.
  2. Maintain Optimal Health: Following the Kenbro chicken vaccination schedule is essential to maintain their health. Regular deworming is also crucial for optimal production. Consult a veterinarian for expert guidance.
  3. Proper Feeding: Feeding Kenbro chickens appropriately is vital for their growth and productivity. Consider using a kienyeji chicken feeding program to plan their diet according to different ages and stages. Free-range feeding and kitchen waste can be beneficial alternatives.
  4. Source from Trusted Breeders: Purchasing Kenbro chickens from trusted breeders like Kenchic Limited ensures quality birds. Proper sourcing leads to healthier and more profitable chickens.

Conclusion

Kenbro chicken offers a host of advantages, including efficient feeding, rapid maturity, high egg production, and adaptability to free-range feeding. Their disease resistance and suitability for both meat and egg production make them a valuable choice for farmers. By implementing proper management practices and sourcing from reliable breeders, farmers can experience the rewarding benefits of raising Kenbro chickens in their poultry ventures.

How Many Eggs Do Kenbro Chicken Lay? Amazing Characteristics

0

Introduction: Kenbro chickens have become a popular choice for farmers in Kenya due to their impressive characteristics and productivity. These versatile birds are known for their ability to produce both meat and eggs, making them a profitable option for poultry farming. In this article, we will explore the exceptional features of Kenbro chickens, their egg-laying capabilities, and how they compare to Kuroiler chickens.

Section 1: Kenbro Chicken – An Ideal Poultry Breed

  1. Dual Productivity: Kenbro chickens are excellent dual-purpose birds, excelling in both meat and egg production. This feature offers farmers the advantage of earning profits from two sources, making them a lucrative investment.
  2. No Brooding Instinct: Unlike some other breeds, Kenbro chickens do not have a brooding instinct. As a result, farmers need to rely on incubators to hatch their eggs and maintain productivity. This reliance on incubation technology allows for more controlled and efficient breeding practices.
  3. Heavy Feeders: Kenbro chickens are known to be heavy feeders, requiring significant amounts of food to support their growth and productivity. Farmers must be prepared to provide them with a nutritious diet to ensure optimal development and yield.
  4. Rapid Maturity Rate: One of the remarkable characteristics of Kenbro chickens is their fast maturity rate. They achieve marketable weights relatively quickly, allowing farmers to benefit from early sales and replenish their flocks with younger birds.

Section 2: Impressive Egg Production

  1. Egg-Laying Capacity: Kenbro chickens are prolific layers, producing an impressive 20 to 25 eggs per month. With an annual yield of approximately 280 eggs, this breed stands out for its high egg productivity compared to other breeds.
  2. Free-Range Adaptation: The breed’s adaptability to free-range feeding further enhances their egg productivity. By foraging for nutrients directly from the ground, Kenbro chickens maintain good health and achieve excellent egg-laying rates.

Section 3: Disadvantages and Comparison with Kuroiler Chicken

  1. Disadvantages of Kenbro Chicken:
  • Heavy Feeders: The breed’s high food consumption can lead to increased feed costs.
  • Lack of Brooding Instinct: Farmers must rely on incubators for hatching, adding to management complexity.
  • Limited Availability: Kenbro chickens can only be ordered directly from Kenchic, potentially limiting accessibility for some farmers.
  1. Comparison with Kuroiler Chicken:
  • Egg Productivity: Kenbro chickens outperform Kuroiler chickens in terms of egg production, laying more eggs per month.
  • Weight: Kenbro hens generally weigh more than Kuroiler hens, providing greater meat yield.

Conclusion

Kenbro chickens stand out as a highly productive and versatile poultry breed, favored by farmers in Kenya for their ability to produce both meat and eggs. With their rapid maturity rate, adaptability to free-range feeding, and impressive egg-laying capacity, they offer considerable advantages to poultry farmers. Despite some disadvantages, Kenbro chickens remain a profitable and rewarding choice for poultry farming ventures. By understanding their unique characteristics and making informed choices, farmers can successfully raise and benefit from these remarkable birds in their operations.

How Do You Feed Kenbro Chicken | Feeding for Faster Growth

0

Introduction: Kenbro chickens are renowned for their robustness, disease resistance, and suitability for commercial rearing. To ensure their faster growth and overall productivity, proper feeding practices are crucial. In this article, we will explore six effective ways to feed Kenbro chickens, along with their advantages, drawbacks, and the importance of vaccination and a feeding program for achieving desired results.

Section 1: Six Ways to Feed Kenbro Chickens

  1. Utilize Proper Feeding Equipment: Invest in essential feeding equipment like feeders, drinkers, tubes, pans, and troughs. These tools maximize feed utilization and lead to better productivity.
  2. Embrace Free-Range Feeding: Kenbro chickens thrive on a free-range basis, obtaining nutrients directly from the ground. This cost-effective method enhances their growth and ensures higher profits.
  3. Feed Chicks with Chick Mash: For young chicks, providing chick mash is crucial for strong bones and optimal growth. It fulfills their nutritional requirements during the early stages.
  4. Offer Growers Mash: Between 9 and 18 weeks, feed your chickens with growers mash to support their development before they start laying eggs. Ensure you source quality feeds from trusted dealers.
  5. Provide Layers Mash for Egg Production: After 18 weeks, transition to feeding layers mash to enhance egg production. This specialized feed promotes the laying of high-quality eggs.
  6. Maintain Adequate Water Supply: Uniformly distribute drinkers to ensure easy access to water for all chickens. Regular cleaning of the drinkers maintains proper hygiene.

Section 2: Advantages of Kenbro Chickens

  1. Rapid Growth: Kenbro chickens mature faster than other breeds, especially with proper feeding. They can achieve weights of up to 4 kg in just 6 months.
  2. Cost-Effective Free-Range Feeding: Their ability to thrive on a free-range system reduces the need to purchase expensive feeds, as they gather nutrients from their environment.
  3. High Egg Production: Kenbro chickens lay a substantial number of eggs compared to other breeds, resulting in increased profits. Feeding them layers mash further enhances egg yield.
  4. Strong Disease Resistance: Kenbro chickens exhibit high resistance to diseases, reducing the need for costly medications and ensuring healthier birds for improved production.

Section 3: Drawbacks of Kenbro Chickens

  1. Lack of Natural Brooding: Kenbro chickens do not have a strong brooding instinct, requiring artificial methods for hatching eggs.
  2. Heavy Feeders: These chickens have a hearty appetite, leading to increased feed costs during their growth period.

Section 4: Importance of Vaccination and Feeding Program

Vaccination: Adhering to the Kenbro chicken vaccination schedule is crucial to prevent and control diseases effectively. Consulting a veterinary doctor or following proper guidelines for self-administration is vital.

Feeding Program: Following a well-planned feeding program is essential for achieving desired growth and productivity. A Kienyeji chicken feeding program PDF provides valuable guidance on feeding intervals and nutritional requirements.

Conclusion

Feeding Kenbro chickens with proper nutrition, whether through free-range or specialized feeds, enhances their growth, egg production, and overall profitability. Regular vaccination and adherence to a feeding program are indispensable for maintaining healthy and productive flocks. By implementing these practices, farmers can ensure the optimal growth and well-being of their Kenbro chickens, leading to successful commercial rearing.

Does a Chicken Have Teeth | Check Out These Surprising Facts!

0

Introduction: Chickens are among the most popular birds globally, reared for various purposes, including meat, eggs, and feathers. Some people also keep them as pets. But do chickens have teeth? In this article, we’ll explore the truth behind this question and delve into how chickens eat without teeth. Let’s unravel the intriguing world of chicken diet and digestion.

Section 1: No Teeth for Chickens

Chickens Lack Teeth: Chickens do not possess teeth. Instead, they rely on their uniquely designed beaks to peck at and break down food before swallowing it. Additionally, they have a gizzard located between their stomach and intestines, which aids in grinding their food.

Egg Tooth: While chickens don’t have teeth, during their infancy, they do have a temporary structure known as the “egg tooth.” This soft tooth is attached to the eggshell and assists chicks in breaking out of their shells during hatching. However, it falls off after a few days and does not serve any chewing function.

Section 2: Reasons Behind Toothlessness

  1. Flight and Teeth: If chickens had teeth inside their beaks, it would hinder their flying ability, as teeth could deform and reduce their effectiveness in the air.
  2. Unique Digestive System: Chickens have a distinctive digestive system that efficiently breaks down food particles into smaller pieces, compensating for the absence of teeth.
  3. The Mighty Gizzard: Chickens possess a powerful muscular organ called the gizzard, which contracts and grinds food into smaller pieces, aiding in digestion.
  4. Prey Adaptation: As prey animals, chickens need to be alert and ready to flee from predators. Having teeth would slow down their eating process, making them vulnerable to attacks.

Section 3: How Chickens Eat Without Teeth

Utilizing the Curved Beak: Chickens skillfully use their curved beaks to scoop up food with ease. While they cannot break down food in their mouths, they compensate with their beaks’ pecking and smashing action.

Effective Pecking Technique: Using their beaks, chickens repeatedly peck and smash food against the ground or, with the help of their feet, trap and break it into small pieces that they can swallow whole. This process aids in proper digestion.

Digestive Journey: Once food is swallowed, it travels down the esophagus, guided by the tongue, and enters a pouch called the crop, where it’s stored for approximately 12 hours. The crop stores food, water, healthy bacteria, and bodily fluids.

Active Digestive System: Chickens’ digestive systems remain active even when they are asleep. From the crop, food moves to the stomach, where digestive enzymes begin their work.

The Mighty Gizzard in Action: Food then proceeds to the gizzard, containing small stones or grit that help break down the food as it moves through the system. The gizzard’s strong muscles contract and grind the food against the grit, breaking it down into easily digestible pieces before it moves to the intestines.

Absorption in the Small Intestine: From the gizzard, the food advances to the small intestine, where the chicken’s body absorbs essential nutrients.

Conclusion

In conclusion, chickens indeed do not have teeth. Instead, they utilize their curved beaks and specialized digestive system, including the powerful gizzard, to effectively consume and digest their food. Understanding these fascinating aspects of chicken diet and digestion sheds light on the remarkable adaptations of these widely-reared birds.

Stages of a Chicken Egg Hatching | A Step-By-Step Guide

0

Introduction: Embarking on the journey of hatching chicken eggs can be a rewarding experience, especially for those interested in starting their backyard flocks. The process takes around three weeks, during which an egg incubator helps control essential factors such as temperature, humidity, and egg turning. Understanding the stages of a chicken egg’s hatching can lead to successful outcomes. This comprehensive guide explores the step-by-step process, from setting up the eggs to witnessing the adorable chicks hatch.

1. Stage 1: Setting Up the Eggs (Day 1)

The hatching journey begins with setting up the incubator and collecting fertilized eggs. The eggs should be placed in the tray with the large end facing up. Maintaining an incubator temperature between 90-100.6 degrees Fahrenheit and humidity around 50-60 percent is crucial at this stage. To ensure successful hatching, a minimum of six eggs should be incubated.


2. Stage 2: Turning the Eggs (Day 1-18)

During the incubation period, eggs should remain undisturbed, except for regular turning. Turning the eggs about three times a day helps the embryo and yolk to be in their proper positions and prevents the developing chick from getting stuck. For convenience, an automatic egg turner can be used to reduce the need for frequent incubator openings.

3. Stage 3: Candling the Eggs (Days 7-10)

Between the 7th and 10th day, candling becomes an essential step. Candling involves shining a light on the eggs to check for signs of embryo development. A dark spot or ring indicates an infertile or deceased chick, requiring removal from the incubator. A living embryo appears as a dark area in the egg with visible blood vessels, indicating a healthy chick.

4. Stage 4: Pre-Hatching (Days 18-21)

As the embryos near full development, the eggs enter the pre-hatching stage. The unhatched chicks position themselves inside the eggs in preparation for hatching.

5. Stage 5: Hatching the Eggs (Day 21)

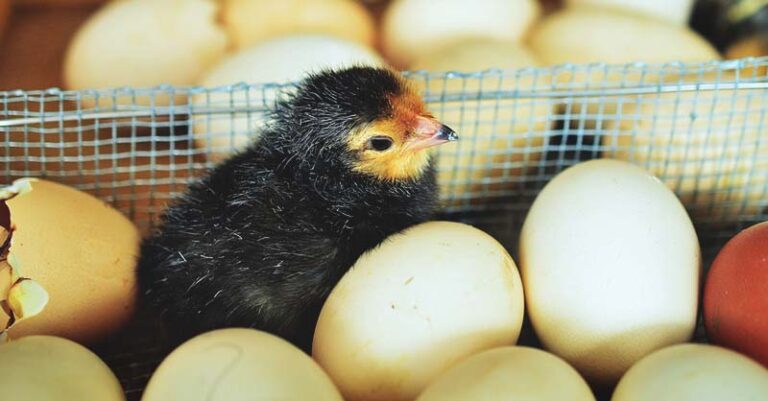
Most chicks hatch on the 21st day, but it is not uncommon for some to hatch on the 22nd or 23rd day. It’s essential not to interfere with the hatching process and allow nature to take its course. The hatching process can take up to 24 hours.

Determining When Eggs Are About to Hatch

Certain indicators can help you know when eggs are about to hatch:

  • Peeping sounds from inside the eggs.
  • Clarity of the air cell at the fat end of the egg.
  • The hen’s behavior, such as sitting on the eggs, ruffling feathers, and clucking.

Hatching Time and Process Once the Shell is Broken

After breaking the shell, a chick typically takes about three hours to complete the hatching process. While the standard hatching time is day 21, variations occur due to different temperatures and humidity levels experienced by the eggs.

Incubation Time and First Chick Hatching

The usual incubation period for a chicken egg is 20-21 days. The first chick may start hatching around 24 hours after the eggs have started breaking.

Conclusion


Embarking on the fascinating journey of hatching chicken eggs requires careful attention and patience. Following the step-by-step guide from setting up the eggs to witnessing adorable chicks hatch can be both rewarding and fulfilling. Maintaining optimal conditions within the incubator ensures a successful hatching process, allowing you to experience the joy of new life as the chicks emerge from their shells.

How Long Do Chicken Eggs Take to Hatch | What Stops Eggs from Hatching

0

Introduction: Understanding the hatching process of chicken eggs is essential for successful poultry breeding. In this informative guide, we’ll explore the time it takes for chicken eggs to hatch, ranging from 21 to 25 days. Additionally, we’ll delve into the common challenges that can hinder the hatching process and the warm water trick for checking egg viability.

 How Long Do Chicken Eggs Take to Hatch?

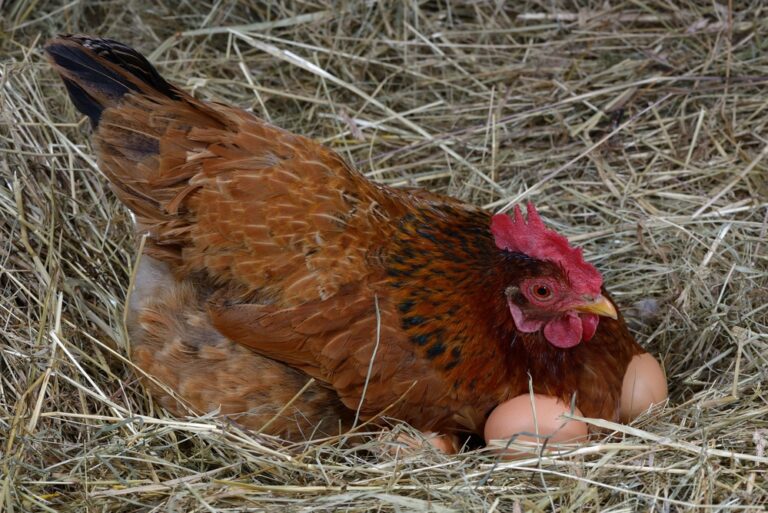
Chicken eggs take approximately 21 days to hatch under the care of a broody hen or in an egg incubator. If the incubator’s temperature is too warm, hatching may occur around day 20, while colder temperatures may delay hatching until days 22 or 23. Natural hatching with a broody hen can take up to 23 days.

Reasons for Eggs Not Hatching After 24 Days

If chicken eggs do not hatch after 24 days, several factors may be contributing to this issue:

  • Incorrect humidity levels affecting gas exchange and shell breaking.
  • Low temperatures hindering chick formation.
  • A sick broody hen’s inability to care for the eggs properly.
  • Eggs that were set in the incubator for too long.
  • Infertile eggs or poor breeding conditions.

3. Why Eggs Do Not Hatch After 30 Days

Eggs may not hatch after 30 days due to similar reasons as above, including infertility, improper handling, or inadequate turning. Additionally, opening the incubator during hatching, insufficient humidity, and unstable temperatures can all hinder the process.

4. The Warm Water Trick for Hatching Eggs

The warm water trick is a simple method to check egg viability and assist in the hatching process. Here’s how it works:

  • Warm water between 37.2 and 37.5 degrees Celsius is prepared in a container.
  • Eggs are placed in the warm water, and a lid is used to cover the container.
  • After 24 to 48 hours, eggs that float or move in the water indicate they are alive and healthy, needing more time for hatching.

5. Reasons for Eggs Not Hatching After 21 Days

If chicken eggs do not hatch after the standard 21 days, these factors may be at play:

  • Incorrect turning of eggs in the incubator.
  • Inconsistent temperature and humidity levels.
  • Embryo issues, such as internal membrane ruptures causing dehydration.
  • Infections in the eggs or broody hen.

6. What to Do When Eggs Don’t Hatch in 21 Days


If eggs do not hatch in 21 days, don’t panic. Allow more time for possible delayed hatching. Do not attempt to help the chick out of the egg after it has pipped, as this can harm the chick. Instead, candle the eggs to check for movement and remove any non-viable eggs.

Conclusion

Chicken eggs typically take 21 days to hatch under proper conditions. Temperature, humidity, and egg handling are crucial factors affecting successful hatching. Common challenges, such as incorrect humidity, low temperatures, and egg infertility, can hinder the process. The warm water trick can help assess egg viability. If eggs do not hatch in the standard time frame, be patient, and take appropriate measures to ensure a healthy and successful hatching experience. With proper care and attention, you can enjoy the thrill of watching adorable chicks emerge from their shells.

How Long Are Fresh Chicken Eggs Good For? (Solved & Explained!)

0

Introduction: Understanding the shelf life of fresh chicken eggs is crucial for proper egg storage and consumption. In this comprehensive guide, we’ll explore the duration of freshness for different types of eggs, including unwashed, washed, farm-fresh, and yard eggs. Discover the impact of refrigeration and how to retain the eggs’ quality for an extended period.

1. Fresh Unwashed Chicken Eggs: Unwashed fresh chicken eggs can stay good at room temperature for approximately 2-3 weeks. The egg’s natural protective coating, known as the “bloom,” helps keep air and bacteria away, preserving their freshness. For extended storage, refrigerate unwashed eggs for up to 4-6 months.

2. Fresh Washed Chicken Eggs: Washed fresh eggs have a shorter shelf life due to the removal of the protective bloom during washing. Refrigerated, washed eggs can last around 2-4 months, while unrefrigerated ones may remain good for 2-3 weeks. Washing eggs should be avoided to maintain their quality and longevity.

3. Farm-Fresh Chicken Eggs: Farm-fresh eggs, unwashed and unrefrigerated, can last up to 2-3 weeks. The bloom present on these eggs acts as a natural shield against bacteria. When refrigerated, farm-fresh eggs can remain good for approximately 3-4 weeks.

4. Yard Eggs: Yard eggs, similar to farm-fresh eggs, can last up to 2 months without refrigeration, provided they are not washed. Refrigeration extends their shelf life to about 3-5 weeks. Avoid washing yard eggs to preserve their protective coating.

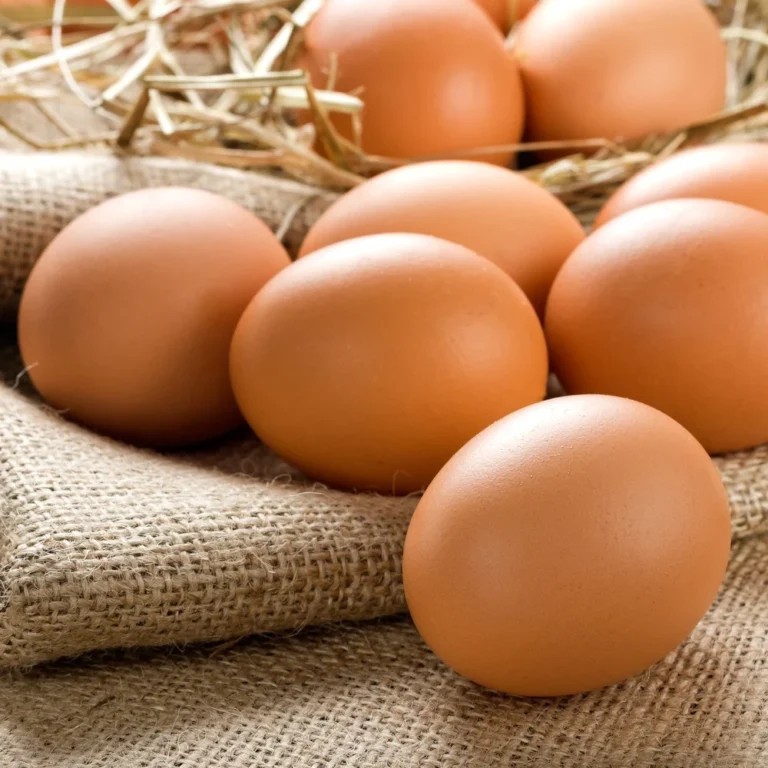
5. Fresh Brown Eggs: The color of an eggshell is determined by the hen’s breed, with brown feathers-producing hens laying brown eggs. Fresh brown eggs can last around 2-4 months when refrigerated and up to 2 months when stored without refrigeration.

6. How to Maximize Egg Freshness: To retain the freshness of chicken eggs for as long as possible:

  • Store unwashed eggs in a cool, dry place if not refrigerated.
  • Refrigerate washed eggs to prolong their shelf life.
  • Avoid washing eggs to keep their natural protective bloom intact.
  • Keep eggs away from strong-smelling foods as they can absorb odors.

Conclusion


Knowing how long fresh chicken eggs last is vital for proper egg storage and consumption. Unwashed eggs can stay good for 2-3 weeks at room temperature and 4-6 months when refrigerated. Washed eggs have a shorter lifespan, lasting 2-4 months in the refrigerator and 2-3 weeks unrefrigerated. Farm-fresh and yard eggs maintain their freshness for 2-3 weeks without refrigeration, while refrigeration extends their life to 3-4 weeks and 3-5 weeks, respectively. To ensure the best quality, avoid washing eggs and store them properly according to their type. With this guide, you can enjoy fresh and delicious chicken eggs for an extended period.

How Many Eggs Can Chicken Lay a Day | How Do Chickens Lay Eggs

0

Introduction: Understanding chicken egg production is essential for those planning to keep chickens for their eggs. This informative article will delve into the number of eggs chickens can lay in a day, week, month, year, and even their lifetime. Additionally, we’ll explore the fascinating process of how chickens lay eggs, shedding light on the various stages involved.

 How Many Eggs Can Chickens Lay in a Day?

On average, a chicken can lay one egg per day, subject to factors such as housing conditions, light intensity, and feed quality. While some chickens may occasionally lay more than one egg in a day, it is not common. A chicken’s laying frequency is also influenced by its natural instinct to accumulate a clutch of eggs before sitting on them.

Egg Production from 100 Chickens in a Day

Given that each chicken can lay one egg a day, 100 chickens would yield 100 eggs per day. However, it’s crucial to provide proper nutrition and care to maximize egg production from the flock.

 Eggs Laid in a Month, Week, Year & Lifetime

The number of eggs a chicken lays in a month, week, year, and its entire lifetime varies depending on factors like breed and environmental conditions. More prolific egg-laying breeds may produce around 25 eggs per month, while ornamental backyard chickens might lay 8 to 10 eggs monthly. In a week, chickens can produce five to six eggs, and under optimal conditions, they can lay between 250 and 300 eggs in a year. Throughout its lifetime, a productive chicken can lay up to 1350 eggs.

The Egg-Laying Process Explained

The process of laying eggs involves several stages:

a. Yolk Release: Egg-laying typically commences when a chicken reaches 18 to 20 weeks old. Light entering the hen’s eye activates the pineal gland, triggering the release of an egg from the ovary. Once matured, the yolk leaves the ovary and moves to the oviduct.

b. Formation of Albumen: In the oviduct, the yolk travels through the magnum and isthmus, where albumen (egg white) forms around it. Chalazae, the rope-like structures, anchor the yolk in the center of the egg.

c. Formation of Egg Shell: The egg shell begins to form in the uterus through the shell gland, taking approximately 20 hours. Pigment deposition may also occur, giving the egg its color. An antimicrobial layer develops on the outer shell for added protection.

d. Laying of an Egg: Finally, the fully formed egg is laid through the hen’s vent or cloaca. The tissues of the uterus extend as the egg is expelled, completing the egg-laying process.

Conclusion

Understanding chicken egg production is crucial for effective egg farming. Chickens can lay around one egg per day, and proper care and nutrition are vital to maximize egg production. Knowing the various stages involved in the egg-laying process enhances our appreciation for these remarkable creatures and the valuable eggs they provide. With this knowledge, you can raise chickens for egg production with confidence and success.

How Long to Incubate Chicken Eggs | Incubation & Hatching (Helpful Tips)

0

Introduction: Incubating chicken eggs is a fascinating process that requires proper care and attention to ensure successful hatching. This guide provides valuable information on the incubation period, handling dirty eggs, determining fertility before incubation, hatching duration, and more. Let’s explore the query-oriented subheadings to help you become a successful chicken egg incubator.

1. Incubation Period: How Long Does It Take?

The incubation period for chicken eggs typically ranges from two to four weeks. To achieve successful hatching, it is crucial to maintain proper conditions in the incubator, including turning the eggs, regulating temperature and humidity, and ensuring proper ventilation. It is recommended to incubate eggs that are at least 6–10 days old since they have a better chance of hatching.

2. Can You Incubate Dirty Eggs?

Yes, you can incubate dirty eggs, but it’s essential to keep them separate from clean eggs to prevent contamination. Washing chicken eggs is not advisable, as it removes the eggshell’s natural defenses and allows bacteria to penetrate. Warm water can be used to clean the eggs if necessary, as it helps push bacteria away from the eggshell.

3. The Importance of Not Opening the Incubator During Hatching During the hatching process, it is crucial not to open the incubator until all the chicks have fully hatched and are ready to be transferred to a brooder. Opening the incubator can disrupt temperature and humidity levels, potentially leading to the death of some chicks inside the eggshells.

4. Determining Fertility Before Incubation: Candling Candling is a method to check for fertility before incubation. By using a bright light source, you can observe the development and growth of the embryo inside the egg. A small white spot about 4 mm wide on the egg yolk indicates fertility.

5. How Long Can Fertile Eggs Last Without Incubation? Fertile eggs can be stored for about a week without continuous incubation. After seven days, it is best to start the incubation process for a successful hatch. To store fertile eggs properly, maintain a clean nest, turn the eggs twice daily, and store them in a cool and dry environment.

6. Frequency of Checking Incubating Eggs During the first two weeks of incubation, it’s advisable to check the eggs every five days. However, during hatching, avoid opening the incubator until all the chicks have hatched to maintain optimal temperature and humidity.

7. Ideal Conditions for Storing Fertile Eggs Fertile eggs can be kept for 6–12 days before incubation. It’s crucial to maintain room temperature during storage, as extreme temperatures can impact the embryo’s development.

8. The Importance of Not Touching Eggs in the Incubator Avoid touching eggs in the incubator, as it can disrupt the hatchability by affecting temperature and humidity levels. Consistent and undisturbed conditions in the incubator allow the embryos to develop properly and reduce embryo mortality.

9. Ensuring Proper Egg Placement in the Incubator It is vital to avoid eggs touching each other in the incubator. Proper spacing between eggs ensures adequate ventilation and prevents poor hatching due to insufficient humidity and temperature control.

Conclusion

Successfully incubating and hatching chicken eggs requires careful attention to various factors, such as incubation period, handling dirty eggs, determining fertility, and maintaining ideal conditions. By following these helpful tips and best practices, you can increase your chances of a high hatch rate and enjoy the rewarding experience of raising chicks from eggs in your incubator.