Friday, October 18, 2024
Home Blog Page 11

How To Grow Basil At Home In Pots

0

Basil is a popular herb known for its delightful fragrance and its ability to enhance the flavor of various dishes. Whether you’re a seasoned gardener or a novice with limited space, growing basil in pots is a rewarding and accessible endeavor. In this guide, we will take you through the process of cultivating fresh basil right at home, using minimal space and resources.

Basil or Tulsi is a popular herb, known for its aromatic leaves and versatility in the kitchen, is a beloved herb among gardeners and cooks. Whether you’re a seasoned gardener or a novice looking to grow basil at home for the first time, this comprehensive guide will walk you through the steps to plant your basil in pots from seeds or cutting. From choosing the right basil varieties to understanding when to plant basil seeds, how to grow basil from cuttings, and how to care for them, we’ll cover all the keyphrases you need for successfully growing basil at home in pots or grow bags. Discover the secrets of how to grow tulsi/basil from seeds, how to maintain your basil indoors or in containers, and how to repot basil plants.

Popular Types of Basil

Before knowing the details of growing basil at home, it is important to know about the popular varieties of basil available in India that can be easily grown from seeds or cuttings:

Sweet Basil: Sweet Basil is the most common variety, known for its sweet, slightly peppery flavor. It’s popular for making classic pesto.

Genovese Basil: Genovese Basil is a subtype of sweet basil, it’s favored for its large, tender leaves and strong flavor.

Thai Basil: Thai basil has a unique anise and licorice flavor that is commonly used in Thai and Vietnamese cuisine.

Lemon Basil: As the name suggests, lemon basil has a refreshing lemon-like aroma and flavor, making it a popular variety of basil.


When to Plant Basil In India?

Basil is a warm-season herb and thrives in temperatures between 70°F to 95°F (21°C to 35°C). It is best to plant basil when the soil is warm, usually in the spring and summer. In India, you can grow basil indoors in any season with a little care and maintenance.

How to Grow Basil At Home?

Growing basil at home from seeds in pots is a simple process. Here’s a step-by-step guide to help you get started:

Materials You’ll Need:

  • Basil seeds
  • Pot or grow bags with drainage holes
  • High-quality potting soil mix
  • Watering can
  • Plastic wrap or a clear plastic bag (Optional)
  • Small gardening trowel

Best Grow Bags Size For Basil Plant:

Select a pot or grow bag that is at least 6-9 inches deep and has drainage holes at the bottom. Proper drainage is important to prevent waterlogged soil, which can harm basil plants. The best sizes of grow bags for planting tulsi/basil are:

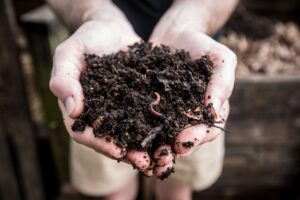
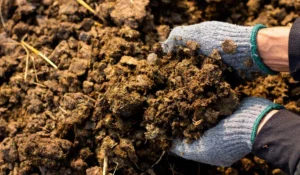
Prepare the Potting Soil:

Fill the pot with a high-quality potting soil mix that offers good drainage and is rich in organic matter. You can also mix in some compost for added nutrients in the soil.

Sow the Basil Seeds:

Sprinkle several basil seeds evenly over the surface of the soil as they are small and may not all germinate. Lightly press the seeds into the soil with your fingers or using a small gardening trowel.

Cover the Seeds:

Gently cover the basil seeds with a thin layer of potting mix or vermiculite. This helps maintain moisture and provides a good environment for germination.

Watering Basil Seeds:

Water the soil thoroughly but gently to ensure the seeds are properly moist. Use a watering can with a fine spray to keep the seeds from scattering.

Create a Mini Greenhouse:

To create a humid environment for fast germination, cover the pot with plastic wrap or keep it in a clear plastic bag.


Provide Warmth and Light:

Place the grow bag or pot in a warm, well-lit area. Basil seeds germinate best at temperatures between 21°C to 25°C. If you’re growing basil from seeds during cooler months, using a heat mat is good for germination. Ensure the plant receives at least 6-8 hours of indirect or direct sunlight every day.

Transplant or Thin Further:

If you have limited space in your container, consider transplanting some of the basil seedlings to another grow bag/pot or thinning them further to provide adequate room for their growth.

Fertilize For Basil Plant:

Once the basil seedlings have a few sets of true leaves, it is best to fertilize with a balanced, water-soluble fertilizer every 4-6 weeks. This will provide the necessary nutrients for healthy growth.

How To Grow Basil Plants From Cuttings

Growing basil plants from cuttings is an effective method to propagate new basil plants. Here’s a step-by-step guide on how tulsi from cuttings:

  • Take a 4-6 inch healthy cutting from a basil plant.
  • Remove lower leaves and leave a few at the top.
  • Dip the cut end in the rooting hormone (optional).
  • Place the cutting in a container of water, making sure the cut end is completely submerged.
  • Place it in a bright spot with indirect light.
  • Change the water every few days.
  • Transplant the cutting with healthy roots into a pot with good-quality soil.
  • Give water and provide sunlight, and you’ll have a new basil plant ready for harvest.

Basil Common Problems


Pests: Watch for common pests like aphids, whiteflies, and spider mites. Use organic neem oil or insecticidal soap to control them.

Diseases: By maintaining good aeration and avoiding overhead watering, you can prevent fungal diseases from affecting your plants.


How To Repot Basil


If you notice your potted tulsi plant becoming root-bound or outgrowing its container, it’s the right time to repot.


Choose a Larger Pot: Select a clean container with proper drainage holes, slightly larger than the current one.

Gently Uproot Basil: Carefully lift the basil plant, taking care not to harm the roots.

Loosen Roots: Gently separate the root ball, helping root adaptation.

Add Fresh Soil: Put a layer of rich, well-draining potting soil in the new pot.

Transplant Basil: Place the basil at the same depth as before and fill it with soil.

Thoroughly Water: After repotting, water properly to reduce transplant shock.

Maintain Care: Keep the repotted basil plants in sunlight, and water regularly, and continue your care routine, including fertilization as needed.

Harvesting Basil Leaves


  • Harvest basil leaves when the plant is about 8-10 inches tall.
  • Pinch or snip off individual leaves or cut entire branches.
  • Continue to harvest every one or two weeks throughout the season to encourage leaf growth. Harvesting your basil plants regularly will help promote new growth and ensure a continued supply of fresh basil for all your culinary delights.

Thanks for reading this article on how to grow basil from seeds or cuttings at home and how to care for basil plants in pots. Share this post with your family and friends and leave a comment if you like it.


How to cultivation Azolla:Step By Step Guide

0

cultivation Azolla : Azolla, a small aquatic fern, has gained popularity in recent years due to its remarkable environmental and agricultural benefits. It’s a versatile plant that can be used as a biofertilizer, livestock feed, and even a sustainable method for wastewater treatment. In this comprehensive guide, we will explore the step-by-step process of cultivating Azolla, which can be easily done in your own backyard or farm.

Nutrition value in Azolla

  • protein (25-35%)
  • Calcium (67 mg/100g)
  • Iron (7.3 mg/100g)

Cultivation process of Azolla

Azolla cultivation requires cement concrete tanks (or) Create a pond artificial for growing Azolla.

To Create a pond Dig out the soil from the pond and level the soil uniformly after that spread the plastic sheet around the pond to stop water loss. Make sure the pond is dug at least 20 CM Deep.

Azolla for the large scale you should construct tank and distributed the soil uniformly across the bottom of the tank. The depth of the layer of soil is should be about 10 cm.

Fill the concrete tank with water till the water reaches to a height of 10 to 15 cm above the soil.

Azolla needs Super Phosphate is to be added at the rate of 5 g per sqm of the concrete tank area every week to grow well.

Azolla needs Cow dung is to be mixed at the rate of 1 to 1.5 kg per sqm of the concrete tank area. Use, cow dung 4-5 days old.

To prevent pest infestation adding 2 g of carbofuran in the tank.

Buy and spread fresh Azolla around 200 g of over the surface of the water. It takes to grow about 2 weeks to cover a mat over the water surface.

Azolla cultivation needs 30% sunlight and direct sunlight will destroy the plant. If the tank or pond under the tree is very safe. otherwise, coconut leaves may be put above the tank also prevents dew during winter.

After two-week, you can harvest 1.5 kg Azolla per day.

Important tips to grow Azolla

To avoid overcrowding .Azolla should be harvested regularly.

Azolla tank changes the water and soil completely, at least once in six months and then add Fresh Azolla.

The pH of the medium should be between 5.5 to 7.

Adding a mixture of Super Phosphate, and cow dung once in 5 days for good growth.

Temperature 35 degrees Celsius is an important factor for good growth.

Azolla for livestock feeding

Green plants have long been recognized by their ability to synthesize amino acids as the cheapest and most available possible source of proteins. Azolla It has been used feed for livestock, so many years throughout Asia to feed ducks, chickens, cattle, fish, sheep, and goats.

Azolla is very rich in Beta Carotene vitamins A, B12 proteins, amino acids, and minerals including, phosphorous, calcium, potassium, ferrous, magnesium copper, On a dry weight basis, Azolla has protein content,25-35% mineral content 10-15%, and 7-10% comprising a combination of amino acids, bio-active substances, and biopolymers. Azolla’s carbohydrate and oil content are very low.

Mosquito Control

Azolla is known as the mosquito control breeding populations by more than 95%. Azolla helps by covering the surface of standing water, freshwater bodies, stops adult mosquitoes from laying eggs in freshwater and also reducing the development of mosquito larvae.

How to grow dragon fruit: Step By Step Guide

0

Introduction: Dragon fruit, also known as pitaya or pitahaya, is a visually stunning and nutritious tropical fruit that is becoming increasingly popular among home gardeners. Cultivating dragon fruit at home is a rewarding experience, and with the right guidance, you can enjoy the exotic taste of this vibrant fruit straight from your garden. This step-by-step guide will walk you through the process of growing dragon fruit, from selecting the right variety to harvesting your first delicious yield. Dragon fruit plants required less expected rainfall areas. Dragon fruit is beneficial for healthy skin and hair.and often used in jams, ice cream, fruit juice, and wine.

  • Family: Cactaceae
  • Scientific name: Hylocereus Undatus
  • Origin: South America
  • Weight: of draggon 150 to 600 grams.some fruit reach 1 kilogram

Sweet pitayas come in three types


  • Hylocereus undatus has pink-skinned fruit with white flesh.
  • Hylocereus costaricensis has red-skinned fruit with red flesh.
  • Hylocereus megalanthus has yellow-skinned fruit with white flesh.

How to cultivation dragon


There are two methods for Dragon fruit Cultivation plantations.

Take a dragon fruit and you may cut the dragonfruit, and cut it into two pieces. Scoop the black seeds out of the inner flesh and wash the excess pulp off the seeds after that. The seeds may be stored when dried. These seeds can be used for cultivation but it takes longer to grow plant and this method is not suitable for commercial cultivation. dragon fruit seed usually germinates after between 11 and 14 days after shallow planting.

Another method is cutting the stem 20 cm length of the mother dragon plants before two days of a plantation. If you grow dragon fruit from the cuttings of a stem, it could take much less time (depending on how large your cutting is).

Dragon Fruit plants can be cultivated any kind of soil, however, they grow well-drained soils. The plants can grow temperatures up to 40 °C (104 °F) India is a tropical country with a moderate climate all round the year. Dragon fruit adapts well to grow in tropical climates. Dragon fruit is a cactus families requires very less water as compared to other crops/fruits. The dragon fruit can survive without water for a long time. The best-recommended method is Drip irrigation. Dragon fruit normally fruits after 18-24 months after plantation.) A framework of concrete poles is required to raise the dragon fruit plants. The plants flower generally from mid-May to June and bear fruit from August to December and in one acre you can plant 1760 number of plants.The yield per acre is 5-6 tonnes.The market rates for dragon fruit in India is around 200-250 Rs per kg


Pests and diseases


  • some fungi, bacteria, and a virus diseases caused In dragon fruit plant.
  • Overwatering or more rainfall can cause the flowers to drop and fruit to rot.
  • The bacterium Xanthomonas campestris diseases causes the stems to rot.
  • Dothiorella fungi diseases can cause brown spots on the fruit.

Dragonfruit nutritional Health Benefits


The nutritional benefits of dragon fruits contain Phytonutrients, Antioxidants, vitamin C, polyunsaturated fatty acids, Carbohydrates Vitamin B,Carotene,Protein.And health benefits of dragon fruit helps to reduce Cholesterol level,Boosts Brain Function,Boosts up Immunity level,Cures Respiratory Disorders,Provides essential moisture to dry skin,Promotes Healthy Hair,Is Good for dengue Patients,Helps In Weight Management,high fiber and antioxidant content,It’s good for your digestion,Helps prevent and fight cancer,Boost your iron levels,it can help support healthy bones,Good for your digestion.

How much farmer can earn money from Dragon Fruit farming in India?


In Indian market price is around Rs200/ per kg.dragon fruit average yield is 5–6 tonne per acre. Dragon fruit takes 26 months for harvesting from August to December. The rings, cow dung, poles fertilizer in every 4 months, worker cost for pruning and irrigation and netting for shielding the plant from birds are the cost. The recurring cost is Rs 1.00 lac per tonne plus there is a fixed cost of, ring, pole drip irrigation. U can calculate it Rs 25,000/ per tonne.in first 2-year total income of Rs 4.50 lacs per acre.These fruits are sold in the Indian market at Rs.300 to 400 per kg, but the general Farm can earn approx between Rs. 125 to 200 per kg.


Conclusion

Growing dragon fruit at home is an exciting journey that rewards gardeners with unique and delicious fruits. By following this step-by-step guide, you can establish healthy dragon fruit plants that thrive in your garden. Experiment with different varieties and enjoy the satisfaction of harvesting your own homegrown dragon fruit.


How To Grow Oyster Mushrooms: Step By Step Guide

0

Introduction: Growing your own oyster mushrooms at home can be a rewarding and sustainable endeavor. Oyster mushrooms (Pleurotus ostreatus) are known for their delicate flavor and numerous health benefits. This step-by-step guide will walk you through the process of cultivating oyster mushrooms, allowing you to enjoy the fruits of your labor in just a few weeks.

Raw material that required for cultivation

  • Oyster mushroom spawns
  • Substrate: Paddy or rice straw
  • Plastic bag

Starting a Mushroom cultivation in 6 Easy Steps

Take a paddy straw and cut the straw into 1 to 3 inch small bits. Heat the paddy straw in boiling water after that. Cook the straw with hot water(80 C) for half an hour, then remove the straw and empty it. Now spread the straw on a clean sheet of polypropylene and let it be 65 percent moisture content.

The pasteurized process completed taking a plastic bag with the paddy straw and mushroom spawn. fill two or three inches of paddy straw into the plastic bag. After that, spread the spawn on top of the bed. Repeat again fills you’ve almost filled the bag, Tie the bag top very tightly and put Ten to 15 small holes should be made on all sides, especially two to four holes in the bottom of the bag to breathe. Don’t forget to use 20-30 days old spawn is best for spawning.

After completing spawned bags are placed in the incubation room for mycelia growth. note the growing area of around 78 degrees F cooler temperature and dark place, keep away from sunlight.

After the bags are moved to a cool place for a day. it is time to place the bag in a brighter spot, for fruiting. It will allow mushroom growth to take place. After five to six days, spawns develop into mycelium. The mycelium starts spreading through the entire straw bag in 10 to 14 days. the next three to five days the, Oyster mushrooms ready for cultivation. The mushroom caps are fully separate from their stems, and it will ready for harvesting.

After the bags are moved to a cool place for a day. it is time to place the bag in a brighter spot, for fruiting. It will allow mushroom growth to take place. After five to six days, spawns develop into mycelium. The mycelium starts spreading through the entire straw bag in 10 to 14 days. the next three to five days the, Oyster mushrooms ready for cultivation. The mushroom caps are fully separate from their stems, and it will ready for harvesting.

After the bags are moved to a cool place for a day. it is time to place the bag in a brighter spot, for fruiting. It will allow mushroom growth to take place. After five to six days, spawns develop into mycelium. The mycelium starts spreading through the entire straw bag in 10 to 14 days. the next three to five days the, Oyster mushrooms ready for cultivation. The mushroom caps are fully separate from their stems, and it will ready for harvesting.

why Oyster mushrooms are so good for you

  • Boosts immune system
  • Cholersterol-free & fatfree
  • Rich Protein & fibrer
  • Very low in sodium iron, zinc, calcium, potassium, phosphorus & selenium
  • Contains high levels of Vitamins B1, B3, B5 & B12 D, D3, D5 and A
  • Anti-oxidant & Anti-cancer

Conclusion

Cultivating oyster mushrooms at home is a satisfying and sustainable way to enjoy this culinary delight. By following this step-by-step guide, you can create an environment conducive to the growth of healthy and flavorful oyster mushrooms. Experiment with different substrates and techniques to find what works best for you, and soon you’ll be harvesting your own batch of homegrown oyster mushrooms.

How To Grow Rambutan Fruits

0

Introduction: Tropical fruits have an irresistible allure, and among them, the rambutan stands out with its unique appearance and delicious taste. If you’re a gardening enthusiast looking to cultivate something exotic and rewarding, rambutan might just be the perfect choice. In this comprehensive guide, we’ll take you through the steps of rambutan cultivation, from choosing the right location to caring for your tree and harvesting the luscious fruit.

A Glimpse into Rambutan’s Origins and Appearance:

The rambutan (Nephelium lappaceum) is a tropical fruit that originates from Southeast Asia, with Indonesia and Malaysia often credited as its birthplace. The name “rambutan” is derived from the Malay word “rambut,” which means “hair” – an apt description for the fruit’s distinctive hairy exterior. The fruit grows on a tree that belongs to the Sapindaceae family, which also includes lychee and longan. The rambutan’s appearance is striking, with its spiky skin ranging in color from yellow to orange and even red. These spikes are soft and pliable, making the fruit relatively easy to peel. Once the skin is gently removed, the true beauty of the rambutan is revealed.

Choosing the Right Location:

Before you dive into rambutan cultivation, it’s crucial to select an appropriate location for your tree. Rambutan trees thrive in warm, tropical climates and require plenty of sunlight. Here are some considerations:

Climate: Rambutan trees flourish in regions with temperatures between 68°F to 90°F (20°C to 32°C). They are sensitive to frost and cannot withstand extended periods of cold weather.

Sunlight: Rambutans require full sunlight, so choose a spot in your garden that receives at least 6-8 hours of direct sunlight each day.

Soil: Well-draining soil with a pH level between 5.0 and 6.5 is ideal for rambutan cultivation. Sandy loam or clay loam soils are suitable.

Selecting the Right Variety:

Some popular varieties include ‘Rongrien,’ ‘Malaysia,’ and ‘Bangkok.’ Research the different varieties to choose the one that suits your climate and taste preferences best.

Planting Your Rambutan Tree:
Once you’ve identified the right location, it’s time to plant your rambutan tree. Follow these steps:

Prepare the Soil: Prepare a planting hole that is twice the size of the root ball of your rambutan sapling. Ensure good drainage by adding organic matter to the soil.

Sapling Selection: Choose a healthy rambutan sapling from a reputable nursery. Look for a well-branched tree with a strong central stem.

Planting: Gently remove the sapling from its container and place it in the prepared hole. Make sure the top of root ball is level with ground surface. Fill the pit well with soil and water.

Spacing: Rambutan trees can grow quite large, so space them at least 30 to 40 feet apart to allow for proper growth and canopy development.

Caring for Your Rambutan Tree:

Rambutan trees require consistent care to thrive. Here’s what you need to do:

Watering: Rambutans need regular watering, especially during dry periods. Keep the soil consistently moist but not waterlogged.

Pruning: Prune your rambutan tree to remove dead or diseased branches and to maintain its shape. Pruning can also improve air circulation within the canopy.

Managing Pests and Diseases:
Like any cultivated crop, rambutan trees are susceptible to pests and diseases. Keep a close watch for common issues such as aphids, mealybugs, and fruit flies. Applying organic or chemical solutions as needed can help keep these problems in check. Regularly inspect the tree for signs of disease, such as leaf discoloration or unusual growths. Address any issues immediately with proper treatment.

Fertilization for Optimal Growth:
Rambutan trees benefit from regular fertilization to ensure healthy growth and bountiful fruiting. To use a balanced fertilizer with an equal ratio of nitrogen, phosphorus, potassium. Apply the fertilizer around the tree’s drip line, avoiding direct contact with the trunk.

Harvesting Rambutan:
Patience is key when it comes to harvesting rambutan. Typically, rambutan trees start producing fruit within 3-5 years of planting. Here’s how to know when it’s time to harvest:

Color Change: Rambutan fruit will change color from green to yellow, orange, or red when it’s ready to harvest.

Easy Separation: The fruit should be easily separable from the tree with a gentle twist. Do not damage the fruit or the tree so do be carefully.

Firmness: Rambutan fruit should have a slight firmness when squeezed, but it should not be too hard or too soft.

Health benefits

Rambutan fruit not only tantalizes your taste buds with its sweet and juicy flavor but also offers several health benefits due to its nutritional composition. Here are some of the health benefits associated with consuming rambutan:

Rich in Vitamins:

Vitamin C: Rambutan is an excellent source of vitamin C, which is known for its antioxidant properties. Antioxidants are help to protect cells from oxidative stress and supports our immune system.

Vitamin A: This fruit contains beta-carotene, a precursor to vitamin A, which is essential for maintaining healthy skin, vision, and immune function.

Antioxidant Properties: Rambutan contains various antioxidants, such as vitamin C, vitamin A, and polyphenols. These antioxidants help combat the damaging effects of free radicals in the body, which are linked to chronic diseases and aging.

Skin Health: The combination of vitamins and antioxidants in rambutan contributes to skin health. Vitamin C promotes collagen production, which is essential for maintaining skin elasticity and reducing the appearance of wrinkles.

Digestive Health: Rambutan is a good source of dietary fiber, which aids in digestion by promoting regular bowel movements and preventing constipation. Adequate fiber intake is also associated with better gut health.

Low in Calories: Rambutan is relatively low in calories, making it a suitable option for those looking to manage their weight. Its natural sweetness can also help satisfy sweet cravings without resorting to high-calorie treats.

Electrolyte Balance: The presence of potassium in rambutan helps maintain electrolyte balance in the body. Potassium is essential for regulating fluid balance, muscle contractions, and nerve function.

Bone Health: Rambutan contains small amounts of calcium, which is essential for maintaining strong and healthy bones. It works in conjunction with other minerals like phosphorus and magnesium to support bone structure and density.

Blood Sugar Regulation: Rambutan has a moderate glycemic index, which means it has a relatively mild impact on blood sugar levels when consumed in moderation. Its fiber content also slows down the absorption of sugars, helping to prevent rapid spikes in blood sugar.

Conclusion

Cultivating rambutan in your own garden can be a rewarding experience. By selecting the right location, providing proper care, and patiently waiting for your tree to mature, you can enjoy the sweet, juicy rewards of this exotic tropical fruit in your backyard. So, roll up your sleeves and embark on the journey of rambutan cultivation – a journey filled with tropical delights.

Mulberry Cultivation And Their Importance

0

Introduction: Mulberry trees (genus Morus) have been cultivated for centuries for their delicious fruits, leaves (used as food for silkworms), and ornamental value. Established in 1971, Mulberry has carved a niche for itself as a symbol of timeless elegance, combining impeccable craftsmanship, innovative design, and a deep appreciation for heritage. Mulberries are versatile and rewarding trees to grow, offering a plethora of benefits from delicious fruits to ornamental beauty. Whether you’re a seasoned gardener or a beginner with a green thumb, this blog post serves as your ultimate guide to mastering the art of mulberry cultivation. From selecting the right variety to nurturing your trees, we’ll walk you through each step of the journey.

Choosing the Right Mulberry Variety:

White Mulberries (Morus alba): Known for their sweet flavor and subtle tartness, these are the most popular mulberries for cultivation. They come in different varieties, including ‘Morus alba Pendula,’ an ornamental weeping variety.

Red Mulberries (Morus rubra): Red mulberries offer a slightly tangier taste and are often grown for fresh eating or culinary purposes.

Black Mulberries (Morus nigra): Black mulberries are known for their rich, complex flavor and are considered a delicacy. They thrive in warm climates.

Selecting the Ideal Growing Location:

Sunlight: Mulberries thrive in full sun, receiving at least 6-8 hours of sunlight daily. However, they can tolerate partial shade.

Soil: Well-draining soil is crucial. Mulberries can adapt to a range of soil types, but they prefer slightly acidic to neutral soils.

Planting Mulberry Trees:

Timing: Plant young mulberry trees in the early spring, after the last frost, or in the fall before the first frost. This gives them time to establish their roots before extreme temperatures.

Spacing: Depending on the variety, space your trees 15 to 20 feet apart. This ensures adequate airflow and room for growth.

Planting: Gently place the tree in the hole, ensuring that the top of the root ball is level with the soil surface. Fill the hole with soil, tamp it down gently, and water thoroughly.

Nurturing and Caring for Mulberry Trees:

Watering: Young mulberry trees need regular watering to establish their roots. Water deeply and consistently, keeping the soil evenly moist. Once established, they’re somewhat drought-tolerant.

Pruning: Prune your mulberry tree in the dormant season (winter) to remove dead or diseased branches and shape the tree. This encourages healthy growth and improved fruit production.

Fertilizing: Mulberries benefit from a balanced fertilizer in early spring before new growth begins. Avoid excessive nitrogen, as it can lead to excessive vegetative growth.

Dealing with Pests and Diseases:

Pests: Keep an eye out for common pests like aphids, caterpillars, and scales. Regular inspections and the use of insecticidal soap or neem oil can help manage infestations.

Diseases: Mulberries are relatively disease-resistant, but they can occasionally face issues like powdery mildew. Proper spacing, good air circulation, and maintaining tree health can prevent many diseases.

Harvesting Mulberries:

Timing: Mulberries ripen from late spring to early summer, depending on the variety and climate.

Harvesting: Gently pick ripe mulberries from the tree. They should come off the stem easily without any resistance. Be cautious, as they are delicate and can stain easily.

Benefits of Mulberry Cultivation:

Nutrient-Rich Harvest: Mulberries are a powerhouse of nutrients, including vitamins, minerals, and antioxidants. Including them into our diet can contribute to our overall health and well-being.

Culinary Delights: From fresh consumption to making jams, pies, and preserves, mulberries offer a wide range of culinary possibilities. Their unique flavor profile adds a touch of sweetness and tartness to various dishes.

Sericulture Potential: Mulberry leaves are the primary food source for silkworms, making them essential for silk production. If you’re interested in sericulture, cultivating mulberry trees is a crucial step in the process.

Medicinal Uses: Traditional medicine has recognized mulberries for their potential health benefits, which range from aiding digestion to supporting heart health. While scientific research is ongoing, their historical use speaks to their medicinal potential.

Ornamental Value: Beyond their fruit-bearing capabilities, mulberry trees boast lush foliage and an appealing silhouette, making them valuable additions to landscapes and gardens.

Conclusion

Growing mulberries can be a delightful and rewarding experience, whether you’re aiming to savor their delectable fruits, create an ornamental garden focal point, or contribute to silk production. By following these comprehensive steps, you’ll be well on your way to nurturing healthy mulberry trees that yield abundant harvests for years to come. Happy cultivating!

How to grow Turmeric plant, Care, Harvsting

0

Introduction: In the realm of culinary and medicinal treasures, few substances can hold a candle to the vibrant and versatile spice known as turmeric. With its deep golden hue and a history stretching back thousands of years, turmeric has left an indelible mark on cultures, cuisines, and health practices across the world. Turmeric, with its vibrant color, distinct flavor, and potential health benefits, has captured the attention of both culinary enthusiasts and health-conscious individuals. What if you could take the journey from planting the turmeric rhizome to harvesting and grinding it into the iconic spice? In this blog, we’ll dive into the world of turmeric cultivation, uncovering the secrets behind growing this golden treasure in your own backyard.

Origins and Cultural Significance

Turmeric (Curcuma longa) is a perennial plant native to Southeast Asia, particularly India. Its root, which resembles ginger in appearance, is the part that is harvested and used for various purposes. Turmeric has played an essential role in the culinary and traditional medicine practices of India, China, and other Asian countries for centuries.

In India, turmeric occupies a sacred place and is often used in religious ceremonies and rituals. It’s also a key ingredient in traditional Indian weddings, where a paste made from turmeric is applied to the bride and groom’s skin before the ceremony, giving the skin a radiant glow and symbolizing purity and prosperity.

Choosing the Right Environment

Turmeric (Curcuma longa) is a tropical plant that thrives in warm, humid conditions. When embarking on the journey of turmeric cultivation, selecting the right environment is crucial. Here are some key considerations:

Climate: Turmeric grows best in temperatures between 68°F and 95°F (20°C to 35°C). It is sensitive to frost, so it’s ideally suited for tropical and subtropical regions.

Sunlight: Turmeric loves sunlight. Ensure your planting area receives ample sunlight, preferably six to eight hours a day.

Soil Quality: Turmeric prefers well-drained, loamy soil with good organic content. It should have a slightly acidic to neutral pH (around 6.0 to 7.5). Adequate drainage is crucial to prevent waterlogging, which can rot the rhizomes.

Planting Turmeric:
Once you’ve selected the right environment, it’s time to plant your turmeric. Follow these steps:

Selecting Rhizomes: Turmeric is propagated from rhizomes, which are underground stems. Choose high-quality, disease-free rhizomes from a reputable source.

Preparing Rhizomes: Cut the rhizomes into sections, ensuring each section has at least one or two buds or “eyes.” This will be the starting point for new growth.

Planting Depth: Plant the rhizomes about 2 to 4 inches (5 to 10 cm) deep in rows or beds, with approximately 8 to 12 inches (20 to 30 cm) of space between each rhizome.

Watering: Keep the soil moist but not water stagnated. Turmeric requires regular watering, especially during dry spells.

Caring for Your Turmeric Plants:

Watering: Turmeric needs constant moisture, especially during that growing season. Water the plants regularly, but avoid waterlogging. Mulching helps to retain the soil moisture and control weeds.

Fertilization: Apply organic fertilizers rich in nitrogen, phosphorus, and potassium before planting. Additional doses of nitrogen-rich fertilizer can be given during the growth period.

Weeding: Keep the area around the turmeric plants free from weeds, as they can compete for nutrients and moisture.

Pest and Disease Management: Turmeric is susceptible to pests like aphids, mites, and leafhoppers, as well as diseases like rhizome rot and leaf spot. Regular inspection and the use of organic pesticides or fungicides can help manage these issues.

Harvesting and Processing:
Turmeric plants take around 8-10 months to mature. When the leaves start turning yellow and the plants begin to die back, it’s a sign that harvest time is approaching.

Harvesting: Gently dig around the rhizomes, being careful not to damage them. Harvest only what you need, as leaving some rhizomes in the ground can promote future growth.

Cleaning and Drying: Wash the harvested rhizomes to remove dirt. Allow to dry in a well-ventilated area away from direct sunlight.

Curing: After drying, cure the rhizomes by placing them in a warm, dark place for about a week. This helps develop their flavor and color.

Grinding: Once fully cured, you can grind the dried turmeric into a fine powder using a mortar and pestle or a spice grinder.

Health Benefits

Beyond its culinary applications, turmeric has been revered for its potential health benefits. The compound responsible for many of these benefits is curcumin, which is found in turmeric and is known for its antioxidant and anti-inflammatory properties. Some potential health benefits of turmeric and curcumin include:

Anti-Inflammatory Effects: Curcumin has been studied for its ability to help manage chronic inflammation, which is linked to numerous chronic diseases.

Antioxidant Properties: Turmeric’s curcumin content may neutralize harmful free radicals, contributing to overall cellular health.

Joint Health: Some research suggests that curcumin’s anti-inflammatory properties could help alleviate symptoms of osteoarthritis and rheumatoid arthritis.

Brain Health: There’s ongoing research into curcumin’s potential to support brain health and potentially reduce the risk of neurodegenerative diseases like Alzheimer’s.

Heart Health: Curcumin might positively influence factors that contribute to heart disease, such as blood pressure and cholesterol levels.

Digestive Health: Turmeric has been traditionally used to aid digestion and soothe gastrointestinal discomfort.

Usage and Precautions

While turmeric offers numerous potential benefits, it’s important to note that its absorption in the body can be limited. Consuming black pepper with turmeric can enhance the absorption of curcumin due to the presence of piperine, a compound found in black pepper. However, individuals taking medications or with certain health conditions should consult a healthcare professional before adding large amounts of turmeric to their diets due to potential interactions or adverse effects.

Conclusion

Turmeric cultivation is a labor of love that connects us with ancient agricultural practices while contributing to the vibrant flavors of our cuisines and the potential wellness benefits of its compounds. From selecting the right soil to nurturing the plants and preparing the final spice, each step in the process contributes to the aromatic and vibrant turmeric powder we use in our kitchens. Whether you’re a home gardener or a commercial farmer, embarking on the journey of turmeric cultivation is a rewarding endeavor that allows you to savor the essence of this golden spice right from the source.

How To Grow Carrots Complete Guide

0

Introduction: Growing your own carrots can be a rewarding and satisfying experience, providing you with fresh and flavorful produce right from your garden. Whether you’re a seasoned gardener or a novice with a green thumb, this comprehensive guide will walk you through the step-by-step process of cultivating delicious carrots in your backyard.

The Nutritional Profile:
Carrots boast an impressive nutritional profile that makes them a valuable addition to any diet. They are a rich source of vitamins, minerals, and dietary fiber, making them a versatile and healthful choice.

Vitamins: Carrots are particularly known for their high vitamin A content, primarily in the form of beta-carotene, which gives them their vibrant orange color. Vitamin A is essential for maintaining good vision, a healthy immune system, and proper skin health. Additionally, carrots contain vitamins C, K, and B6, contributing to immune support, blood clotting, and overall well-being.

Minerals: These root vegetables are a great source of minerals like potassium, which supports heart health and helps maintain proper fluid balance in the body. They also contain small amounts of calcium, magnesium, and phosphorus, all of which play important roles in bone health and muscle function.

Dietary Fiber: Carrots are an excellent source of dietary fiber, aiding in digestion and promoting a feeling of fullness. The fiber content also supports gut health by acting as a prebiotic, nourishing beneficial gut bacteria.

Selecting the Right Carrot Varieties:

Before you begin cultivating carrots, it’s essential to choose the right variety for your growing conditions and preferences. Common types include Nantes (cylindrical and sweet), Imperator (long and slender), and Chantenay (short and stout). Additionally, you can explore colorful varieties like purple and yellow carrots for added visual appeal.

Preparing the Soil:
Carrots thrive in loose, well-draining soil with plenty of organic matter.

Choose the Right Location: Carrots prefer full sun but can tolerate partial shade. Choose a spot in your garden that gets at least 6-8 hours of sunlight daily.

Soil Testing: Test your soil to determine its pH level. Carrots prefer slightly acidic to neutral soil with a pH range of 6.0 to 7.0.

Amend the Soil: Incorporate organic matter like compost or well-rotted manure into the soil to improve its fertility and structure.

Loosen the Soil: Carrots need loose, friable soil to grow straight and unobstructed. Remove rocks, roots, and debris, and use a garden fork or tiller to break up compacted soil.

Planting Carrot Seeds:
Carrots are usually grown from seeds rather than transplants. Follow these steps for successful planting:

Seed Spacing: Carrot seeds are tiny, so they need to be spaced carefully. Sow seeds about ¼ to ½ inch deep and 2-3 inches apart in rows. Space rows 12-18 inches apart.

Thinning: Once your carrot seedlings are about 2-3 inches tall, thin them to ensure proper spacing. Leave 2-3 inches between each seedling.

Watering and Thinning:
Maintain consistent moisture during the germination period, which typically takes 1-3 weeks. Be careful not to over water as the seeds will rot. Once the seedlings have sprouted and grown a couple of inches tall, thin them out to provide adequate space for each carrot to develop. Space between plants should be 2-3 inches.

Fertilization:
Carrots are relatively light feeders, but they still benefit from a balanced fertilizer application. Apply a balanced fertilizer according to the manufacturer’s instructions when the carrot foliage is about 3-4 inches tall. Avoid using excessive nitrogen, as this can lead to lush foliage but stunted roots.

Pest and Disease Management:
Monitor your carrot plants for signs of pests like aphids, carrot rust flies, and nematodes. You can use natural remedies like neem oil or introduce beneficial insects to control pest populations. Proper spacing and well-drained soil can also help prevent certain diseases like root rot.

Harvesting:
The moment of truth arrives when it’s time to harvest your homegrown carrots:

Timing: Carrots are usually ready for harvest 60 to 80 days after planting, depending on the variety. Check the seed packet for specific detail information.

Signs of Readiness: Carrots are ready to be harvested when their tops are about 1/2 inch in diameter. Gently pull the carrot up and check its size and color. They should have a vibrant color and a firm texture.

Harvesting Technique: To harvest, grasp the carrot’s foliage near the top of the root and gently pull while wiggling the root. If the soil is compacted, use a fork to loosen the soil before pulling.

Storing Your Harvest:
After harvesting, remove the tops of the carrots to prevent them from drawing moisture from the roots. Store your carrots in a cool, humid environment to keep them fresh. You can store them in the refrigerator or in a root cellar with sand or sawdust to maintain their quality for several months.

Health Benefits:

Eye Health: The beta-carotene in carrots is converted into vitamin A in the body, which is important for maintaining good vision. Vitamin A helps prevent night blindness and contributes to the overall health of the eyes.

Heart Health: The potassium in carrots supports heart health by helping to regulate blood pressure and maintain proper heart rhythm. The fiber content also contributes to cardiovascular health by reducing cholesterol levels.

Skin Health: The vitamins and antioxidants in carrots play a role in maintaining healthy skin. Vitamin A, in particular, supports skin cell production and repair, contributing to a glowing complexion.

Weight Management: The dietary fiber in carrots promotes satiety, making them a great snack for those looking to manage their weight.

Conclusion

The carrot, with its vibrant color and numerous health benefits, is truly a nutritional powerhouse. From supporting eye health to aiding digestion and promoting heart health, this root vegetable deserves a place on your plate. Whether enjoyed raw as a snack or incorporated into various dishes, carrots offer a tasty and nutritious way to enhance your diet and overall well-being. Growing carrots can be a gratifying experience that allows you to reconnect with nature and enjoy the fruits (or in this case, vegetables) of your labor. With the right variety, soil preparation, care, and attention to detail, you can cultivate a bountiful crop of nutrient-rich carrots that will not only enhance your culinary creations but also deepen your appreciation for the wonders of gardening.

How to Make Organic Pesticides at Home for Garden Plants: The Ultimate Guide for Indian Gardeners

0

With the growing awareness about the importance of organic gardening, it’s crucial to find eco-friendly solutions to common garden problems. Homemade organic pesticides are not only cost-effective but also safe for the environment. This article is designed to guide Indian gardeners on how to make their own organic pesticides right at home. Let’s dive in.

Why Choose Organic Pesticides?


Organic pesticides are safer for both your garden and the environment. They are free from harmful chemicals and are often made from easily available household ingredients.

Basic Ingredients

Here are some common ingredients you can use to make organic pesticides at home:

Neem Oil: Effective against a broad spectrum of insects.

Garlic: Acts as a repellent and insecticide.

Chilli Powder: Discourages pests due to its spicy content.

Soap: Helps the mixture stick to plant surfaces.

Best Organic Pesticide Recipes

Best Homemade Organic Pesticides for Garden Plants

Neem Oil Spray

Ingredients:

  • 2 tablespoons neem oil
  • 1 tablespoon liquid soap
  • 1 litre water

Method:

  • Mix the neem oil and liquid soap in water.
  • Stir well and transfer to a spray bottle.

Garlic and Chilli Spray


Ingredients:

  • 5 cloves of garlic
  • 1 tablespoon chilli powder
  • 1 litre water

Method:

  • Crush the garlic and mix with chilli powder.
  • Add water and let the mixture sit for a day.
  • Strain and transfer to a spray bottle.

Baking Soda and Oil Spray

Ingredients:

  • 1 tablespoon baking soda
  • 1 tablespoon vegetable oil
  • 1 litre water

Method:

  1. Mix baking soda and vegetable oil in water.
  2. Transfer the mixture to a spray bottle.

Best For: Fungal diseases like mildew

Epsom Salt Spray


Ingredients:

  • 2 tablespoons Epsom salt
  • 1 litre water

Method:

  • Dissolve the Epsom salt in water.
  • Fill a spray bottle with the solution.

Onion and Garlic Spray

Ingredients:

  • 1 onion
  • 5 cloves of garlic
  • 1 litre water

Method:

  • Blend onion and garlic into a paste.
  • Mix the paste with water and let it sit overnight.
  • Strain and fill a spray bottle with the liquid.

Tobacco Spray

Ingredients:

  • 1 cup tobacco leaves
  • 1 litre water

Method:

  • Soak the tobacco leaves in water for 24 hours.
  • Strain the liquid and transfer it to a spray bottle.

How to Apply Organic Pesticides

Test First: Always test the spray on a small portion of the plant and wait 24 hours.

Apply Evenly: Make sure to cover both the top and bottom of the leaves.

Reapply: Organic pesticides often need to be reapplied more frequently.

These recipes offer a wide array of solutions for common gardening problems faced by Indian gardeners, all while keeping it organic and eco-friendly. Choose the one that best suits your gardening needs and make sure to always conduct a patch test before full application.

Creating your own homemade organic pesticides is an effective, eco-friendly approach to garden care. Using simple household ingredients, Indian gardeners can tackle common garden pests without harming the environment.

FAQs on Making Organic Pesticides at Home for Garden Plants

1. Are homemade organic pesticides as effective as chemical pesticides?

Homemade organic pesticides may not work as quickly as chemical ones, but they are safer for the environment and non-toxic. Consistent and proper application enhances their efficacy.

2. How often should I apply homemade organic pesticides?

Organic pesticides generally need to be applied more frequently than their chemical counterparts. Depending on the severity of the pest problem, you may need to apply it once a week or even more often.

3. Can I store leftover organic pesticide mixtures?

Storing homemade organic pesticides is generally not recommended as their potency can decrease over time. It’s best to prepare small batches and use them immediately.

4. Are these organic pesticide recipes safe for all plants?

It’s advisable to conduct a patch test before applying any new organic pesticide on your plants. Apply the mixture to a small area and observe for any adverse reactions for 24 hours.

5. Can homemade organic pesticides harm beneficial insects?

While organic pesticides are generally safer, they can still affect beneficial insects like bees and ladybugs. Try to apply the spray during times when these insects are less active.

Happy Gardening!


Asil Chicken Breed Profile, Varieties, Characteristics

0

Introduction : Asil, also known as Aseel Chicken, is a unique and ancient breed with distinct characteristics and varieties. In this comprehensive guide, we will explore the various aspects of Asil Chicken, including its origins, physical traits, varieties, behavior, advantages, and disadvantages.

Breed Profile

Name: Asil or Aseel Chicken
Varieties: Numerous, categorized by size and color
Chicken Weight: 4 to 5 lbs
Eggs: 5-20 tinted
Cost: Typically $100 to $120
Rarity: Considered rare
Purpose: Ornamental
Egg Laying: Poor
Egg Color: Cream or Tinted
Egg Size: Medium to large
Comb Type: Pea Comb
Feathered Legs: No
Number of Toes: 4
Cold Hardiness: Hardy in winter
Heat Tolerance: Not especially heat-hardy
Personality: Aggressive and intelligent; males should be kept separate from other males
Uses: Fighting, ornamental, and as pets

Origin of Asil Chicken

Asil Chicken is an ancient breed originating from India, particularly Punjab and South India. It’s renowned in southern states like Andhra Pradesh and Tamil Nadu. While not standardized in India, its popularity led to standardization in the USA, UK, and Australia. Asil chickens are famous for cockfighting, a tradition in some Indian regions. They are known for their strength, intelligence, and aggressive behavior from a young age.

Physical Characteristics of Asil Chicken

Asil chickens are known for their striking appearance, with wide chests, long necks, and legs compared to other breeds. They come in various varieties, often categorized by color or physical traits. Some have long tails and thick, parrot-like beaks, while others have feather beards or tufts on their heads. Asil roosters can weigh 3-4 kg, while hens weigh 2.5-3 kg on average.

Some Asil Chicken Varieties

Kilimookku Aseel (Parrot Beak/Nose Long Tail): These are muscular and resemble bodybuilders with long tails and thick beaks. They are known for their proud attitude and fighting spirit.
MayilKaruppu (Black and Yellow)
Kagam/sengaruppu (Black and Red)
Sevalai (Red)
KarumKeeri/Senkeeri (Black/Red Dotted)
Sambal Boothi (Grey)
KokkuVellai (White)
Noolan (White and Black)
Pondram (Golden Brown)
Asil Chicken Behavior

Asil hens are seasonal layers but excellent sitters and protective mothers. They tend to become broody. Asil chicks can be aggressive from an early age and should be kept separate to avoid fighting. Despite their fighting nature, they are friendly toward humans and can be easily tamed. Asil chickens thrive in dry conditions and are not well-suited for cold climates.

Advantages of Asil Chicken Farming

  • Beautiful and intelligent birds
  • Healthy meat and eggs rich in vitamins and proteins
    Loyal pets
  • Resistant to various weather conditions and diseases

Disadvantages of Asil Chicken Farming

  •  Stubborn and aggressive behavior
  • Difficulty in maintaining multiple roosters or hens together
  • Longer maturity time
  • Poor egg-laying capabilities
  • Expert Comment

 conclusion

Asil Chicken is a remarkable breed with a rich history and distinctive characteristics. While their aggressive nature and limited egg production may not suit all poultry enthusiasts, they remain an important part of India’s cultural heritage and have found a place in ornamental farming worldwide.

Gerbera Project Report, Polyhouse, Greenhouse Cultivation

0


Introduction:
Gerbera, a member of the daisy family, owes its name to the renowned German botanist Traugott Gerber. Originating from South America, Asia, and Africa, it’s also known as the African daisy. Gerbera is a favored decorative and cut flower, with its popular cultivars derived from Gerbera Jamesonii and Gerbera Viridifolia, resulting in Gerbera Hybrida. In India, it’s cultivated in states like Maharashtra, Karnataka, Gujarat, Tamil Nadu, West Bengal, and Himachal Pradesh.

Soil Preparation


Gerbera’s roots delve deep, so soil selection is crucial. Opt for highly porous, well-drained soil with a pH of 5.5 to 6.5 and a salinity level below 1 ms/cm. Red lateritic soil is ideal. Avoid poultry and other manures. Mix soil with FYM (2:1 ratio) and sterilize it under the sun or using hydrogen peroxide with silver.

Greenhouse Setup

A well-ventilated greenhouse with 50% white shade nets on top is essential. Maintain temperatures between 12°C to 35°C, humidity at 70-75%, and ensure proximity to markets. Specifications include a minimum height of 5-6.5m, north-south gutter direction, 200-micron polythene, and proper land leveling.

Bed Preparation

Create raised beds for better drainage. Add a 6-inch layer of gravel or rocky soil if dealing with black cotton soil. Mix soil and sand with organic manure, neem cake, and rice husk. Bed dimensions: 1.5ft height, 2ft width, 1ft spacing.

Planting Gerberas

Plant with the crown 1-2 cm above soil level, accommodating two rows with 30cm spacing between plants. Opt for a variety of flower colors for commercial planting.

Irrigation Requirements

Water should have a pH of 6.5 to 7, EC less than 0.7 ms/cm, hardness less than 200 ppm, and TDS less than 450 ppm. Schedule irrigation based on plant growth, from overhead to drip irrigation. Monitor soil moisture and avoid excessive watering.

Fertilization and Manure

Basal fertilizers include single super phosphate, magnesium sulfate, biozyme granules, and humiguard granules. Adjust nutrient schedules based on soil analysis every 2-3 months. Employ fertigation for efficient nutrient delivery.

Pest and Disease Management

Common pests like aphids and mites can be controlled with traps or chemicals. Diseases like root rot and powdery mildew can be managed with fungicides and biological treatments. Follow precautions for chemical use.

Cultural Practices

Regular weeding and soil raking are essential. Disbud plants to remove inferior buds. Remove old, dry leaves to maintain plant health.

Harvesting and Yield

Gerbera has a 30-36 month life cycle and is ready for its first harvest in 7-8 weeks. Harvest when stamens develop fully for better vase life. Pluck flowers in the morning or evening, cut stems at an angle, and treat harvested flowers with sodium hypochlorite.

Cost and Profit Analysis

The cost of Gerbera cultivation varies but is estimated for a 500 sq m area. The average yield per plant is approximately 40 flowers per year, with specific quality standards.

conclusion

Gerbera cultivation in polyhouses and greenhouses offers a lucrative opportunity for farmers. With the right soil, irrigation, and care, it can yield high-quality flowers and substantial profits.

Terrace Gardening (Rooftop Gardening) Information

0

Introduction: Terrace gardening, also known as rooftop gardening, is an innovative and sustainable way to harness urban spaces for cultivating plants and vegetables. It offers numerous benefits, from maximizing limited space to providing fresh produce and improving the environment. In this article, we’ll delve into the world of terrace gardening, providing valuable information and insights for aspiring urban gardeners.

Getting Started with Terrace Gardening

Choosing the Right Location

Selecting an ideal location for your terrace garden is crucial. Ensure that the area receives ample sunlight, typically 6-8 hours a day, for optimal plant growth. Assess the structural integrity of your rooftop to support the weight of containers, soil, and plants.

Container Selection

Terrace gardening relies on containers or raised beds. You can use various containers, such as pots, grow bags, wooden crates, or specially designed raised beds. Ensure they have proper drainage to prevent waterlogging.

Soil and Growing Medium

Quality Soil Mix

Use a high-quality potting mix or soilless growing medium for your containers. These mixes are lightweight, well-draining, and enriched with essential nutrients. They also reduce the risk of soil-borne diseases.

Compost and Organic Matter

Incorporate organic compost or vermicompost into the soil to boost fertility and microbial activity. Organic matter enhances water retention and provides nutrients to your plants.

Selecting Suitable Plants

Container-Friendly Varieties

Choose plants that are well-suited for container gardening. Herbs, leafy greens, tomatoes, peppers, and dwarf fruit trees are popular choices. Consider the growth habits and space requirements of your selected plants.

Nurturing Biodiversity

Encourage biodiversity by planting a variety of species. Companion planting can deter pests and improve overall garden health.

Care and Maintenance

Watering

Proper watering is vital for terrace gardens. Water your plants consistently, keeping the soil evenly moist but not waterlogged. Container plants may require more frequent watering than those in the ground.

Fertilization

Use organic fertilizers or compost tea to provide essential nutrients to your plants. Fertilize based on the specific needs of each plant and follow recommended application rates.

Pruning and Pest Management

Regularly inspect your plants for pests and diseases. Prune as needed to promote healthy growth. Employ organic pest control methods, such as neem oil or insecticidal soap.

 Sustainability and Environmental Considerations

Rainwater Harvesting

Consider setting up a rainwater harvesting system to collect rainwater for your garden. It’s an eco-friendly way to conserve water and reduce your environmental footprint.

Composting

Utilize kitchen scraps and garden waste to create compost, reducing waste and providing nutrient-rich soil amendments for your terrace garden.

Benefits of Terrace Gardening

Fresh Produce

Terrace gardens allow you to grow your own fresh and organic produce, reducing the need for store-bought vegetables and herbs.

Improved Air Quality

Plants on your rooftop contribute to improved air quality by absorbing carbon dioxide and releasing oxygen, making urban environments healthier.

Conclusion

Terrace gardening is a fulfilling and sustainable way to make the most of limited urban space while enjoying the benefits of fresh produce and a green oasis in the midst of a concrete jungle. By carefully selecting containers, soil, plants, and implementing eco-friendly practices, you can create a thriving rooftop garden that enhances your life and the environment. Whether you’re a seasoned gardener or just starting, terrace gardening offers endless possibilities for urban dwellers seeking a closer connection to nature.

Types of Organic Fertilizers for Plants in Agriculture

0

Introduction:  Organic farming practices have gained significant popularity due to their emphasis on sustainability and environmentally friendly methods. A fundamental aspect of organic agriculture is the use of organic fertilizers to enrich soil and provide essential nutrients to plants. In this article, we’ll explore various types of organic fertilizers commonly used in agriculture, highlighting their benefits and applications.

1. Compost

Rich in Nutrients

Compost is a nutrient-rich organic fertilizer made from decomposed organic matter, such as kitchen scraps, yard waste, and manure. It is a valuable source of essential nutrients, including nitrogen, phosphorus, and potassium (N-P-K).

Soil Enrichment

Compost improves soil structure, enhances water retention, and promotes beneficial microbial activity. It also helps to maintain a balanced pH level in the soil.

2. Manure

Natural Source of Nutrients

Animal manure, such as cow, chicken, and horse manure, is a traditional organic fertilizer rich in nitrogen, phosphorus, and potassium. It also contains valuable micronutrients.

Application Methods

Manure can be applied directly to the soil or composted to reduce the risk of pathogens. Proper composting ensures that the nutrients are readily available to plants.

3. Bone Meal

High in Phosphorus

Bone meal is an organic fertilizer derived from crushed animal bones, typically cattle bones. It is an excellent source of phosphorus, making it beneficial for flowering and fruiting plants.

Slow-Release Nutrient

Bone meal releases nutrients gradually, providing a steady supply of phosphorus over time. It’s especially useful in addressing phosphorus deficiencies in the soil.

4. Fish Emulsion

Complete Nutrient Package

Fish emulsion is made from fish remains, such as bones and offal, and is a fantastic source of nitrogen, phosphorus, and potassium. It also contains trace elements like calcium.

Quick Nutrient Uptake

This liquid fertilizer is rapidly absorbed by plants, making it an excellent choice for foliar feeding or addressing nutrient deficiencies quickly.

5. Seaweed Extract

Rich in Micronutrients

Seaweed extract is derived from various species of seaweed and is prized for its micronutrient content. It contains essential elements like iron, zinc, and manganese.

Stress Resistance

Seaweed extract can enhance a plant’s ability to withstand environmental stressors, such as drought and disease. It also stimulates root growth.

6. Blood Meal

High Nitrogen Content

Blood meal is a nitrogen-rich organic fertilizer made from dried animal blood, often from cattle or poultry slaughterhouses. It’s an excellent source of quickly available nitrogen.

Balancing Nitrogen Levels

Blood meal can help correct nitrogen deficiencies in the soil and promote lush, green growth in plants. However, it should be used sparingly to avoid over-fertilization.

Conclusion

Organic fertilizers are a cornerstone of sustainable agriculture, promoting healthy soil and plant growth without relying on synthetic chemicals. By choosing the right organic fertilizer for specific plant needs and soil conditions, farmers and gardeners can foster productive and environmentally friendly agricultural practices. Whether it’s compost, manure, bone meal, fish emulsion, seaweed extract, or blood meal, each type of organic fertilizer offers unique benefits to enhance plant health and yield while respecting the principles of organic farming.


Growing Chilli in Pots (Peppers) Information

0

Introduction: Chilli peppers, also known as hot peppers or simply chillies, are a favorite addition to various cuisines worldwide. Their vibrant colors and fiery flavors add a unique dimension to dishes, making them a staple in many gardens. While chillies are often grown in traditional garden beds, they can also thrive when cultivated in pots or containers. This article provides valuable information on how to successfully grow chilli peppers in pots, allowing even those with limited space to enjoy a bountiful harvest.

Selecting the Right Container

Size Matters

When opting for container gardening, choosing the right pot size is crucial. Chilli plants have extensive root systems, so select a container with a minimum diameter of 12-18 inches (30-45 cm) to ensure ample space for root growth. Additionally, make sure the pot has drainage holes at the bottom to prevent waterlogging, which can harm the plants.

Material and Quality

Containers made of terracotta, plastic, or glazed ceramic are suitable for growing chilli peppers. Each material has its advantages: terracotta provides good aeration, plastic retains moisture well, and glazed ceramic adds an aesthetic touch. Regardless of the material, ensure the container is sturdy and in good condition.

Choosing the Right Pepper Variety

Consider Space and Climate

Select chilli pepper varieties that are well-suited to your climate and available growing space. Compact or dwarf pepper varieties are ideal for small pots and indoor gardening, while larger containers can accommodate taller or bushier varieties. Research the optimal growing conditions and maturity periods for your chosen pepper variety.

Potting Mix and Soil Preparation

Well-draining Mix

Use a high-quality potting mix that provides good drainage and aeration. Avoid using garden soil, as it can lead to compaction and poor drainage in containers. A typical potting mix for peppers consists of a blend of peat moss, perlite, and compost.

Fertilization

Peppers are heavy feeders, so it’s essential to provide them with nutrients. Incorporate slow-release fertilizer into the potting mix or use liquid fertilizer during the growing season. Follow the manufacturer’s recommendations for application rates.

Planting Chilli Seeds or Transplants

Starting from Seeds

If you’re starting from seeds, sow them in seed trays or small pots indoors about 6-8 weeks before the last expected frost date in your region. Once the seedlings have developed a few sets of true leaves, transplant them into your chosen containers.

Using Transplants

Alternatively, you can purchase young chilli pepper plants from a nursery or garden center. Transplant them into your containers after any risk of frost has passed. Ensure proper spacing between plants to allow for healthy growth.

Caring for Chilli Pepper Plants

Sunlight

Chilli peppers thrive in full sunlight. Place your containers in a location that receives at least 6-8 hours of direct sunlight daily. If growing indoors, use grow lights to provide adequate illumination.

Watering

Maintain consistent soil moisture. Water the plants when the top inch (2.5 cm) of the soil feels dry to the touch. Avoid overwatering, as this can lead to root rot. Use a saucer under the pot to catch excess water.

Pruning and Support

Prune the pepper plants to encourage bushier growth and better airflow. You can use stakes or cages to support taller varieties as they grow.

Harvesting Chilli Peppers

Chilli peppers can be harvested once they reach their desired size and color. Gently twist or cut the peppers from the plant to avoid damaging the stems. Regular harvesting encourages continued fruit production.

Conclusion

Growing chilli peppers in pots or containers is a rewarding experience that allows individuals with limited space to enjoy a bountiful harvest of these fiery delights. With the right container, potting mix, variety selection, and care, you can cultivate healthy and productive chilli plants that will spice up your culinary adventures. Whether you have a small balcony, patio, or even a sunny windowsill, growing chilli peppers in pots is a versatile and accessible gardening option.

Kisan Credit Card For Farmers In India

0

Introduction:  In India, agriculture is the backbone of the economy, employing a significant portion of the population and contributing substantially to the nation’s GDP. However, farmers often face financial challenges in meeting their agricultural and allied needs. To address this issue and promote agricultural growth, the Indian government introduced the Kisan Credit Card (KCC) scheme. This article explores the Kisan Credit Card scheme, its features, eligibility criteria, and the significant impact it has had on empowering farmers across the country.

A Lifeline for Farmers: The Kisan Credit Card Scheme

Flexible Credit for Farming Needs

The Kisan Credit Card scheme is a financial lifeline for Indian farmers, offering them a revolving line of credit. This credit card-like facility enables farmers to access funds as and when needed for various agricultural purposes, including purchasing seeds, fertilizers, pesticides, and covering other cultivation expenses. The flexibility in accessing credit ensures that farmers can manage their finances efficiently throughout the cropping season.

Inclusivity in Agricultural Finance

One of the remarkable aspects of the KCC scheme is its inclusivity. It caters not only to large-scale farmers but also to small and marginal farmers, tenant farmers, sharecroppers, and self-help groups (SHGs) or joint liability groups (JLGs) of farmers. This inclusivity promotes financial empowerment among farmers from diverse backgrounds, contributing to a more equitable agricultural landscape.

Key Features of the Kisan Credit Card Scheme

Interest Subvention

A paramount feature of the KCC scheme is the government’s provision of interest rate subvention. This subsidy significantly reduces the cost of credit for farmers, making it more affordable and accessible. Farmers often receive loans at lower interest rates, lightening the financial burden on them and encouraging timely repayment.

Collateral-free Loans

For smaller loan amounts, the KCC scheme typically offers collateral-free loans. This feature is particularly beneficial for small and marginal farmers who may not have significant assets to pledge as collateral. It eases the credit application process and ensures that farmers can secure the funds they need without excessive bureaucracy.

Insurance Coverage

KCC holders often enjoy insurance coverage for their crops and livestock. This coverage acts as a safety net for farmers in the event of crop failure or other unforeseen circumstances. It provides financial protection and minimizes the risks associated with agricultural activities, allowing farmers to invest confidently in their farms.

Application Process and Accessibility

Seamless Application Procedure

Applying for a Kisan Credit Card is a straightforward process. Farmers can visit their local bank branches or the nearest financial institution offering the scheme. They must complete the KCC application form and provide essential documents, including proof of identity, address, land ownership, and passport-sized photographs.

Validity and Renewal

KCCs are typically valid for three to five years and can be easily renewed upon expiration. This continuity ensures that farmers have consistent access to credit across multiple cropping seasons, promoting long-term agricultural planning and growth.

Conclusion

The Kisan Credit Card scheme has emerged as a powerful tool for uplifting Indian farmers by providing them with flexible and affordable access to credit. Its unique features, including interest rate subvention, collateral-free loans, and insurance coverage, empower farmers to invest in their agricultural activities with confidence. By promoting inclusivity and financial stability in the agricultural sector, the KCC scheme plays a pivotal role in advancing India’s agricultural growth and securing the livelihoods of millions of farmers across the country.


Agriculture Loans For Farmers In India

0

Introduction: In India, agriculture plays a significant role in the country’s economy, and farmers often require financial assistance to support their agricultural activities. Various financial institutions and government agencies offer agriculture loans to farmers to help them with crop cultivation, livestock rearing, farm equipment purchase, and other agricultural needs. Here are some common types of agriculture loans available to farmers in India:

  1. Crop Loans: Crop loans are short-term loans provided to farmers to meet the cost of crop production, including seeds, fertilizers, pesticides, labor, and irrigation expenses. These loans are usually offered at subsidized interest rates and are repayable after the harvest.
  2. Kisan Credit Card (KCC) Scheme: The Kisan Credit Card scheme is a specialized credit program for farmers. It provides farmers with a revolving line of credit to meet their agricultural and allied needs. Farmers can withdraw money as per their requirements, and interest is charged only on the amount used. The KCC also offers insurance coverage for crops and livestock.
  3. Term Loans: Term loans are typically provided for long-term investments in agriculture, such as purchasing land, constructing farm infrastructure, or buying agricultural machinery and equipment. These loans have longer repayment tenures and may be secured against collateral.
  4. Livestock Loans: Livestock loans are designed for farmers engaged in animal husbandry. These loans can be used to buy cattle, poultry, or other livestock, as well as for building shelters and purchasing fodder.
  5. Farm Equipment Loans: Farmers can obtain loans to purchase tractors, plows, harvesters, and other agricultural machinery. These loans help improve farm productivity and reduce labor costs.
  6. Dairy Farming Loans: Dairy farming loans are tailored to meet the needs of dairy farmers. These loans can be used to buy milch animals, construct dairy sheds, and purchase dairy equipment.
  7. Horticulture Loans: Horticulture loans are aimed at fruit and vegetable growers. Farmers can use these loans to develop orchards, vineyards, or horticultural gardens.
  8. Fishery Loans: Fishery loans are designed for fishermen and aquaculture farmers. These loans can be used to invest in fish farming infrastructure, purchase fishing boats, or set up fish processing units.
  9. Warehouse Receipt Loans: Under this scheme, farmers can obtain loans by pledging their stored agricultural produce in accredited warehouses. The value of the produce serves as collateral for the loan.
  10. Government Subsidies and Schemes: The Indian government also offers various subsidies and schemes for farmers, such as interest rate subvention, debt waiver programs, and financial incentives for adopting modern farming practices. These programs vary from state to state.

Farmers in India can access these loans through cooperative banks, regional rural banks, public sector banks, and other financial institutions. The terms and conditions, interest rates, and eligibility criteria for agriculture loans may differ based on the lending institution and the specific scheme. It’s advisable for farmers to contact their local bank or agricultural department to learn about the available loan options and to ensure they meet the necessary requirements for obtaining financial assistance.

Growing Thyme Herb – A Beginners Guide

0

Introduction: Thyme, with its fragrant leaves and versatility in the kitchen, is a wonderful herb to cultivate. Whether you’re an experienced gardener or just starting, growing thyme can be a rewarding experience. This beginner’s guide will walk you through the steps to successfully cultivate thyme in your garden.

Understanding Thyme: A Culinary and Medicinal Treasure

Thyme (Thymus vulgaris) is a perennial herb known for its aromatic leaves and a distinct earthy flavor. Besides its culinary applications, thyme has medicinal properties, making it a valuable addition to your herb garden.

Choosing the Right Thyme Variety:

Thyme comes in various varieties, each with its unique flavor and growth habits. Common varieties include:

  1. Common Thyme (Thymus vulgaris): The standard culinary thyme with a classic flavor.
  2. Lemon Thyme (Thymus citriodorus): Infused with a lemony scent, ideal for dishes needing a citrus twist.
  3. Creeping Thyme (Thymus serpyllum): A ground-covering variety, perfect for rock gardens or between stepping stones.

Selecting the Growing Location:

Thyme thrives in well-draining soil and plenty of sunlight. Choose a location that receives at least six hours of direct sunlight daily. Ensure the soil is well-draining to prevent root rot.

Planting Thyme:

  1. Seeds or Transplants: You can start thyme from seeds indoors or purchase transplants from a nursery. If starting from seeds, sow them indoors about 6-10 weeks before the last expected frost.
  2. Transplanting: If using transplants, space them around 12 inches apart in your garden after the last frost has passed.

Caring for Thyme:

  1. Watering: Thyme prefers slightly dry conditions. Water when the soil feels dry to the touch, but avoid overwatering, as it can lead to root rot.
  2. Pruning: Regularly trim thyme to encourage bushier growth. Pinch off the tips of the stems to promote new growth.
  3. Fertilizing: Thyme doesn’t require much fertilizer. A balanced, all-purpose fertilizer applied in spring should suffice.
  4. Mulching: Mulch can help retain soil moisture and control weeds around your thyme plants.

Harvesting Thyme:

You can start harvesting thyme once the plant is established, typically after about three months. Harvest by snipping the stems just above the leaves. Avoid harvesting more than one-third of the plant at a time.

Preserving Thyme:

Thyme can be preserved for later use. Try drying the leaves by hanging them upside down in a cool, dark place. Alternatively, freeze thyme leaves in ice cube trays with water or oil.

Common Pests and Diseases:

Thyme is relatively resistant to pests and diseases. However, you may encounter aphids or spider mites. In such cases, treat with neem oil or insecticidal soap.

Conclusion

Growing thyme in your garden is not only a delightful culinary addition but also a step towards sustainable and healthy living. With the right care and attention, your thyme plants will flourish, providing you with a steady supply of this aromatic herb for years to come.

Agriculture Vastu Information Guide

0

Introduction:  In the realm of agriculture, the synergy between nature and human practices is crucial. Integrating ancient principles like Vastu with innovative agricultural techniques has led to the exploration of using Azolla—a prolific aquatic plant—in the context of Vastu. This marriage of age-old wisdom and contemporary methods holds the potential to enhance not only crop yield but also the energetic balance of the agricultural landscape.

Understanding Agriculture Vastu: A Holistic Approach to Farming

Agriculture Vastu is rooted in the idea that the spatial arrangement and orientation of elements impact the energetic flow of a farm. Just as Vastu principles are applied to design and construct homes, the concept extends to the agricultural domain. By aligning with Vastu principles, farmers aim to channel positive energies for optimal growth and harmony in their fields.

Azolla: A Unique Addition to Agriculture Vastu

Azolla’s incorporation in agriculture Vastu stems from its diverse benefits. As an aquatic fern, Azolla contributes to water bodies, fostering a balanced ecosystem. Its rapid growth and nutrient-absorbing abilities make it an asset in maintaining water purity. In the context of Vastu, the presence of Azolla can be seen as a positive contributor to the overall energy of the farm.

Enhancing Crop Yield and Energy Flow: The Role of Azolla

  1. Nutrient Enrichment: Azolla acts as a natural biofertilizer, adding essential nutrients to the water. When strategically placed, it infuses the water body with vital elements that can benefit surrounding crops.
  2. Water Balance: Azolla’s remarkable growth aids in water management. It helps prevent excessive evaporation, maintaining water levels and optimizing irrigation practices.
  3. Energy Harmonization: In the realm of Vastu, the positioning of Azolla corresponds to specific energy channels. Its presence is believed to enhance the flow of positive energies throughout the farm.

Incorporating Azolla in Agriculture Vastu: Practical Steps

  1. Selecting Water Bodies: Identify suitable water bodies on the farm for Azolla cultivation. Ponds, tanks, or even specially designed containers can house this beneficial plant.
  2. Azolla Cultivation: Follow standard Azolla cultivation practices, ensuring optimal growth conditions. Regular monitoring and maintenance are essential to reap its benefits.
  3. Placement and Arrangement: In alignment with Agriculture Vastu principles, strategically place Azolla-bearing water bodies to optimize energy flow. Consult Vastu experts or practitioners for guidance.

Balancing Tradition and Innovation: The Future of Azolla in Agriculture Vastu

The integration of Azolla within the framework of Agriculture Vastu represents a fusion of tradition and innovation. While ancient principles guide the placement and usage of Azolla, modern scientific insights validate its positive contributions to water management and nutrient enrichment.

Conclusion

As the agricultural landscape evolves, embracing holistic approaches like Agriculture Vastu and harnessing the potential of Azolla showcases the dynamic synergy between ancient wisdom and modern advancement. By incorporating Azolla in alignment with Vastu principles, farmers have the opportunity to not only enhance crop yield but also create an energetically harmonious environment that nurtures both the land and those who tend to it.

Panchagavya Preparation and Its Importance

0

Introduction: Panchagavya, an age-old concoction derived from five sacred products of the cow—milk, curd, ghee, urine, and dung—has gained prominence for its multifaceted applications in agriculture, health, and spiritual practices. This traditional elixir embodies the holistic approach of utilizing cow-derived products for the betterment of both humans and the environment.

Understanding the Components: The Five Elements of Panchagavya

Panchagavya’s potency stems from its five core ingredients:

  1. Milk: Rich in nutrients and enzymes, milk forms the base of Panchagavya, contributing to its nourishing properties.
  2. Curd: Curd, a probiotic powerhouse, enhances microbial activity, promoting soil health and plant growth.
  3. Ghee: Ghee, or clarified butter, adds essential fatty acids and acts as a carrier for nutrients, aiding their absorption.
  4. Urine: Cow urine, often revered for its medicinal value, contributes essential minerals and enzymes for plant growth.
  5. Dung: Cow dung, a natural source of beneficial microorganisms, enriches the concoction and improves soil structure.

Preparing Panchagavya: A Blend of Science and Tradition

Panchagavya preparation involves meticulous steps:

  1. Collection: Collect fresh cow products, ensuring their purity and quality.
  2. Mixing: Combine the cow-derived ingredients in specific proportions, maintaining the right balance.
  3. Fermentation: Allow the mixture to ferment for a set duration, enabling beneficial microorganisms to proliferate.
  4. Straining: After fermentation, strain the mixture to remove solid particles, obtaining a nutrient-rich liquid.

Applications and Importance: The Versatility of Panchagavya

Agriculture: Panchagavya acts as a natural growth promoter and pest deterrent. Its application enhances soil fertility, stimulates root development, and improves overall plant health.

Health and Well-being: Panchagavya’s consumption is believed to have various health benefits, from boosting immunity to aiding digestion.

Spiritual Significance: Panchagavya holds spiritual importance in certain traditions, symbolizing the reverence for the cow and its divine connection.

Sustainability: Panchagavya aligns with sustainable farming practices by reducing reliance on chemical inputs and promoting organic cultivation.

Innovative Usage: Panchagavya’s potential extends to biogas production, waste management, and even skin care products.

Conclusion

Panchagavya preparation is a testament to the wisdom of ancient practices that harmonize nature, agriculture, and well-being. By tapping into the inherent benefits of cow-derived products, Panchagavya offers a path to sustainable agriculture, improved health, and a deeper connection with our roots. As modern agricultural practices seek sustainable alternatives, Panchagavya’s significance remains ever relevant, bridging tradition with innovation for a balanced future.

Azolla Cultivation Information Guide

0

Introduction: Azolla, a remarkable aquatic fern, has gained attention for its exceptional potential in various agricultural applications. With its nitrogen-fixing abilities and impressive growth rate, Azolla offers a sustainable solution for enhancing soil fertility and providing nutritious feed for livestock.

Setting the Stage: Creating the Ideal Environment for Azolla Growth

Creating the right conditions is crucial for successful Azolla cultivation. Ensure a water body with moderate sunlight and temperature between 20°C to 30°C. Azolla thrives in water bodies with a pH range of 6.5 to 7.5. Nutrient-rich water supplemented with organic matter is essential for its growth.

Selecting the Right Species: Exploring Different Azolla Varieties

Several Azolla species are available for cultivation, each with its unique characteristics. Azolla pinnata, Azolla caroliniana, and Azolla filiculoides are common choices. Select a species that suits your climate, purpose, and available resources.

Propagation Techniques: Multiplying Azolla Effectively

Azolla can be propagated through spores, fragmentation, or micropropagation. Sporulation involves the release of spores that develop into new plants. Fragmentation includes dividing larger Azolla mats into smaller portions. Micropropagation utilizes tissue culture techniques to rapidly produce Azolla.

Creating a Suitable Growth Medium: Substrates for Azolla Cultivation

A growth medium acts as the foundation for Azolla cultivation. Common substrates include water bodies, cement tanks, or plastic containers. The chosen medium should provide stability, nutrient availability, and optimal water retention.

Nutrient Management: Fueling Azolla’s Nutrient-Rich Growth

Azolla’s growth depends on nutrients like nitrogen and phosphorous. Introducing organic matter or supplementing with organic fertilizers can enhance its nutrient content. Regular water exchange and nutrient monitoring are essential to maintain optimal conditions.

Harvesting and Utilization: Harnessing the Potential of Azolla

Azolla can be harvested every 7 to 10 days, ensuring that only a portion of the mat is collected to allow regrowth. Utilize harvested Azolla as a biofertilizer for crops, a protein-rich feed for livestock, or even in biogas production. Its ability to fix nitrogen contributes to improved soil health.

Benefits and Future Prospects: Exploring Azolla’s Potential

The benefits of Azolla cultivation are multifaceted. It reduces the need for chemical fertilizers, promotes sustainable agriculture, and offers an eco-friendly feed source. With ongoing research, Azolla’s potential for wastewater treatment, carbon sequestration, and even as a potential source of biofuel is being explored.

Challenges and Precautions: Navigating Potential Hurdles

While Azolla cultivation is promising, challenges like excessive growth, contamination, and temperature sensitivity can arise. Regular monitoring, maintaining optimal conditions, and addressing issues promptly are key to successful cultivation.

Conclusion

Azolla cultivation presents an exciting opportunity for sustainable agriculture and resource utilization. By understanding its growth requirements, propagation methods, and diverse applications, farmers and enthusiasts can harness the power of this remarkable aquatic fern to contribute to a greener and more productive world.